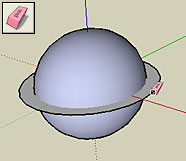
Spheres in Sketchup
There are a few ways to draw a sphere in sketchUp.
- If you don't have SketchUp installed, download it from sketchup.com and install it.
Method 1
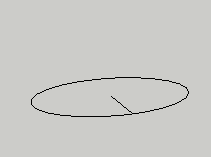
- Select the Circle tool to draw a circle on the ground plane.
Start your circle at the origin point (the point where the red, green, and blue axes intersect).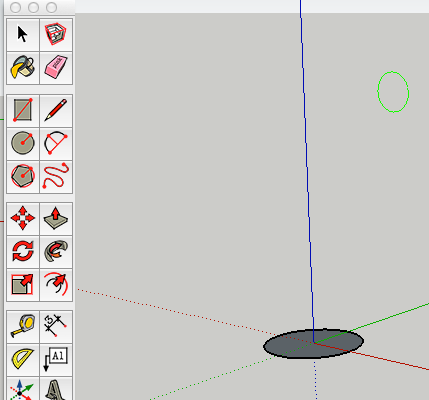
-
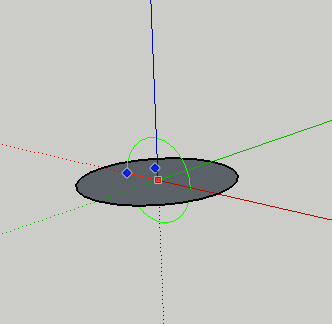
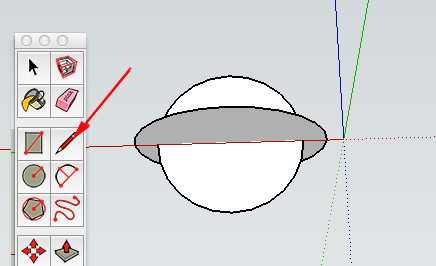
With the Circle tool still selected, move your cursor along the top edge of the drawing until the circle cursor turns red or green, and then press and hold the Shift key to lock that inference direction (both of these inference directions are perpendicular to the ground plane).
- With the inference direction locked, draw a second circle inside the first, but make it a little smaller than the first. Then use the Select tool to select the face of the first, larger circle.
- Select the Select tool and click on the first circle.
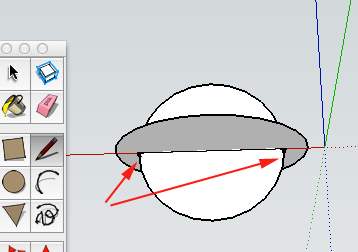
- Select the Follow Me tool, and then click the face of the second, smaller circle. A sphere should result.
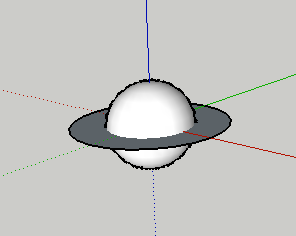
- Use the Erase tool to erase the edge of the first, larger, circle. That circle should be entirely erased, leaving the full sphere.
Method 2
- Use the sphere tool plugin. Download the plugin from https://sites.google.com/site/jimfoltz/my-sketchup-plugins/sphere-tool.
- Install the rb file in your plugins folder.
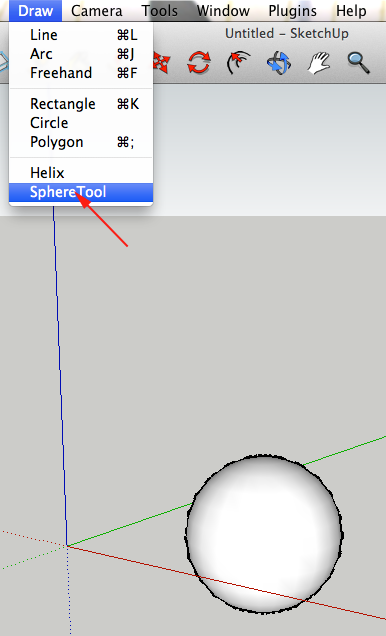
- To use the plugin, select Draw>SphereTool

- Click and drag to create spheres.
- These spheres will be part of a group.
- You might find that your faces are flipped.
CTRL+ click on the group and select Edit Group. CTRL+click and from the menu select
Reverse faces. CTRL + click again and select Close group
Method 3
- Use another sphere tool plugin. Download the rp_sphere.rb plugin from regularpolygon.org.
- Install the rb file in your plugins folder.
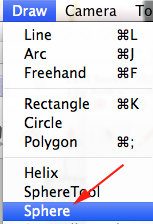
- To use the plugin, select Draw>Sphere.
- Enter the parameters in the dialog box, and click OK.
You can specify the number of latitude lines and longitude lines to control the amount of geometry created. The more lines, the more smooth the surface will be.
You can also control the edge properties so that they are Smooth, Soft, or Visible.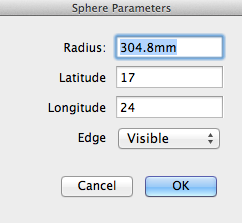
- Click and drag to draw the form. The sphere will be drawn as a component
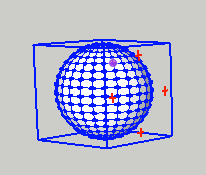
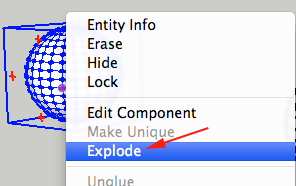
- CTRL+click on the component and select explode
-
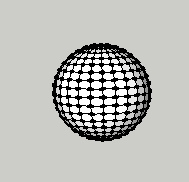
To draw some interesting sphere shaped polyhedra, just set the edge properties to Visible, and enter a small number for the latitude and longitude lines.
Making Domes
- Select the Circle tool to draw a circle on the ground plane.
Start your circle at the origin point (the point where the red, green, and blue axes intersect).
-
With the Circle tool still selected, move your cursor along the top edge of the drawing until the circle cursor turns red or green, and then press and hold the Shift key to lock that inference direction (both of these inference directions are perpendicular to the ground plane).
- With the inference direction locked, draw a second circle inside the first, but make it a little smaller than the first. Then use the Select tool to select the face of the first, larger circle.
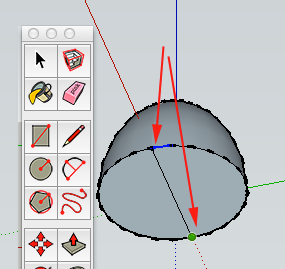
- Select the Pencil tool and click on the first circle.
- Draw a line on the under side of the two circles
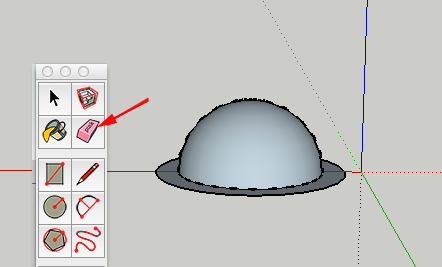
- Select the Eraser tool and erase the lower half of the second circle
- Select the Select tool and click on the first circle
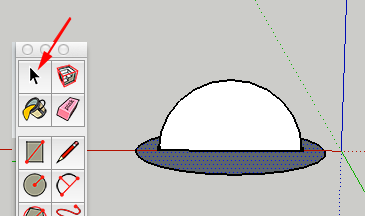
- Select the Follow Me tool, and click on the face of the second circle. A dome should result.
- Select the Eraser tool and erase the edge of the first circle
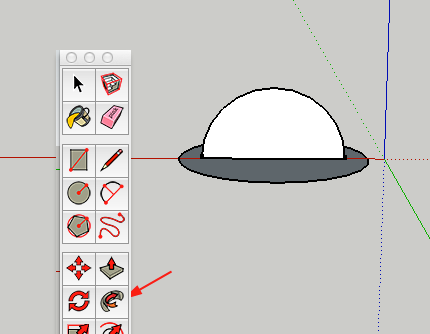
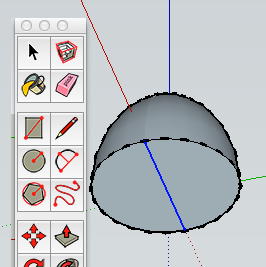
- Select the Pencil tool and draw a line across the bottom of the dome
- Select the line with the Select tool, then erase it
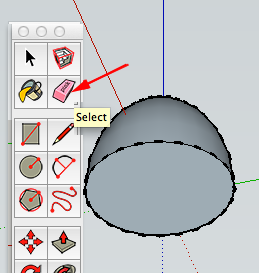
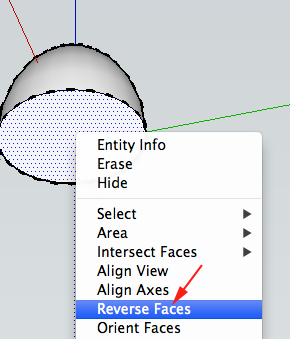
- If your form is dark, you might need to reverse the faces. CTRL+click on the form and select Reverse Faces
Now what?
- Create a model with spheres
