Scaling with Sketchup
What is it?
How do you know the correct percentage to scale up or scale down?
What's the tutorial?
How to get what you want
The Scaling Tool
- You can use the Scaling tool (S) to scale an entity. if you click on a corner point, the opposite corner should be hi-lighted. When you drag you can scale up or scale down while constraining the proportions of the shape
- If you hold down ALT/OPTION and drag from a corner you can scale from the center while constraining the proportions:
- If you click on nodes other than the corner you can scale without constraining the proportions
- If you want to scale an entity to a certain size, remember this:
Divide what it needs to be by what it currently is.
So if you want the length to be b and it is currently a, divide b by a to get the percentage. - Use the Tape Measure tool (T) to find the current dimension (a tilda indicates approximate measurement):
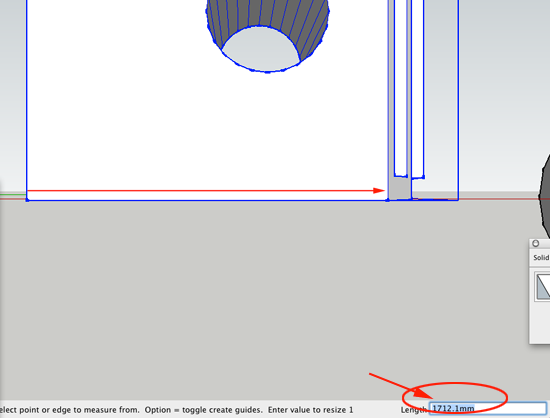
- If you want the new length to be 800, divide 800 by 1712.1
to get .46726242626015. Select the Scale tool (S) choose opposite corners start to drag in then type the scale in the Measurement toolbar and press ENTER/RETURN.
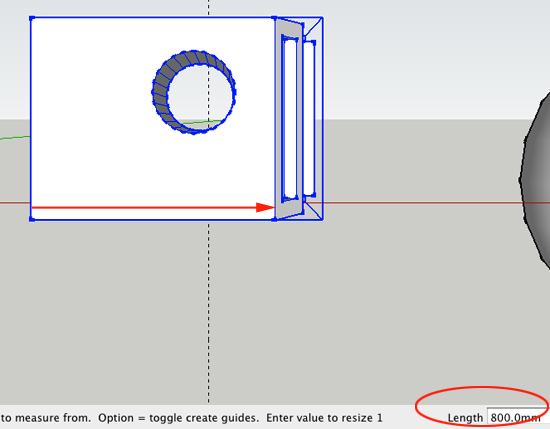
- Use the Tape Measure tool (T) to check the new dimension:
The Tape Measure Tool
- You can use the Tape Measure tool (T) to scale an entity.
- Select the Select tool (spacebar) and triple click the entity you want to scale to select it.
- CTRL+click and select Make Group from the Context Menu.
- Use the Tape Measure tool (T) to measure the current dimension of the entity. Click one end of a line segment to set the starting point of a measurement. Move the mouse to the end point of the same line segment. A temporary measuring tape line, with arrows at each end, will stretch out from your starting point as you move the mouse. Click again at the other end of the line segment. The distance is displayed in the Measurements toolbar.
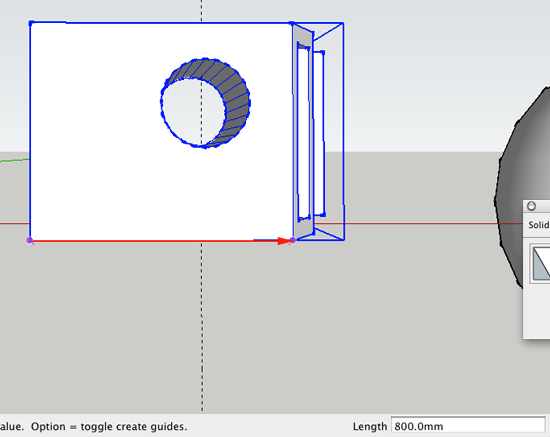
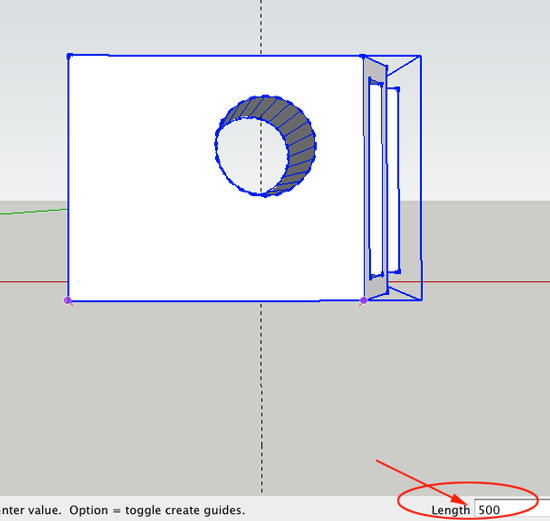
- Type a new number and press ENTER/RETURN.
-
SketchUp will ask you if you want to rescale your object:

Installing the Fredo Scale plugin
The Fredo Scale plugin created by Fredo6 from SketchUcation.com allows you to scale, taper, shear on a plane, stretch, twist, radial bend and rotate your entities.
- Navigate to The extension warehouse and search for Fredo Scale.
- Install the Fredo Scale.
- Fredo Scale is dependent on LibFredo6 by fredo6. Search and install this as well.
Using the plugin
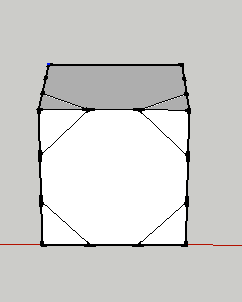
- Create the front side of a truncated cube:
- Create at least one other object that you want to scale.
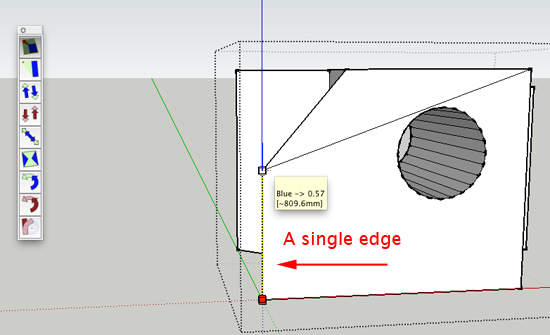
- Select one or several objects (faces, edges, groups or components). Fredo Scale allows you to scale even a single edge.
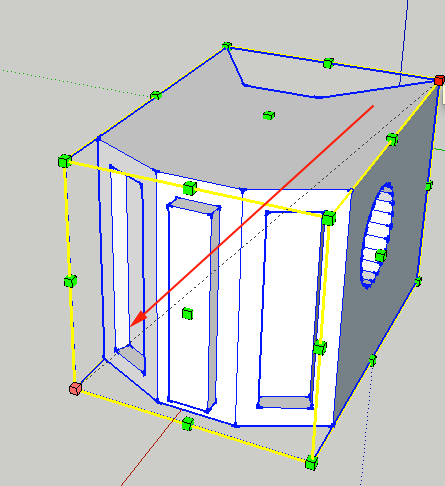
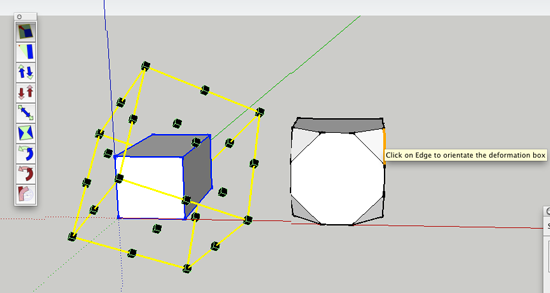
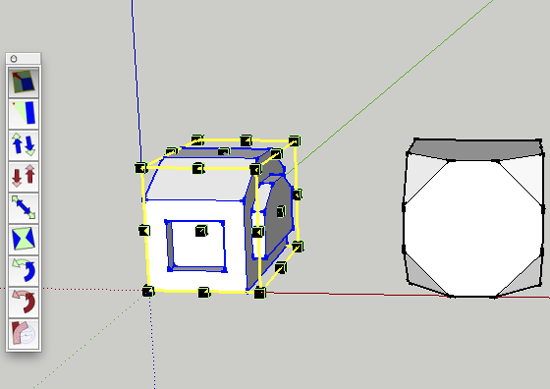
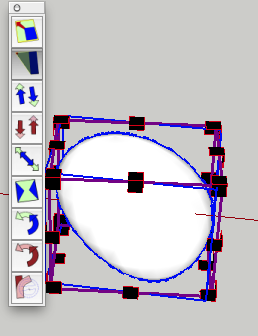
- Click on the top icon. This is Box Scaling.
- Click and drag on the handles to perform the deformation. Toggle the CTRL/OPTION key to perform the deformation from the center.
Clicking outside the selection will display a green arrow cursor. Clicking outside will allow you to exit the tool.
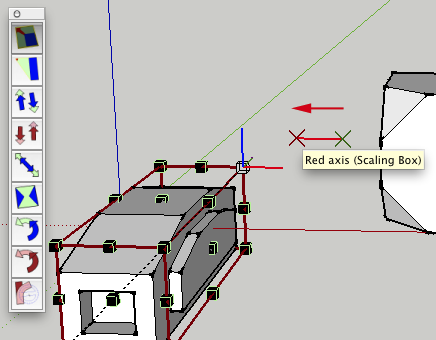
- Mouse over edge of the partially truncated cube. When you move the mouse over edges, notice that they highlight in orange. If you click, the scaling box will realign
along the selected edge.
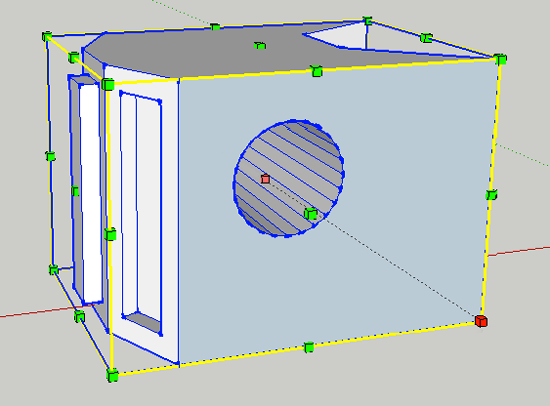
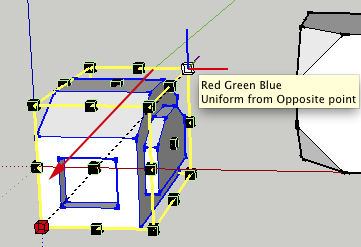
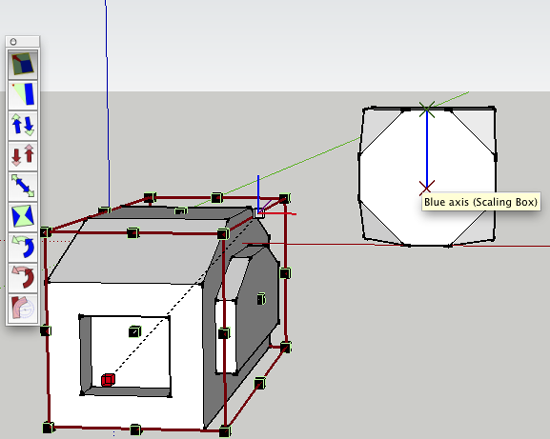
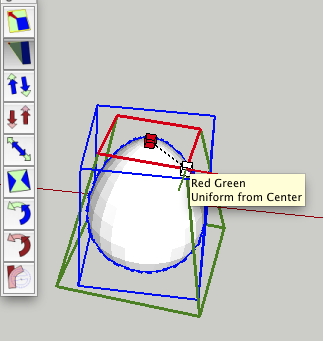
- You can mouse over a face as well. The cursor will become a Red arrow. Click on the face and the scaling box will align with the face plane:
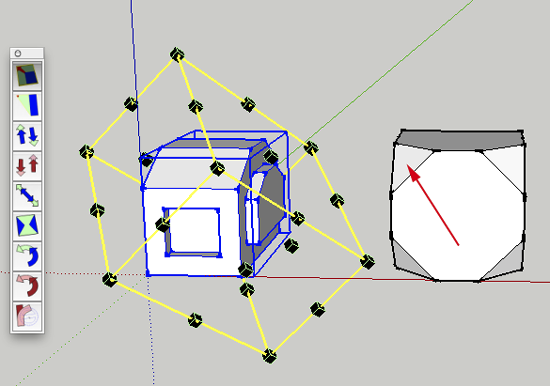
-
To reset the orientation, press the Down arrow on the keyboard:
- CTRL+ click on the selected object to check the Contextual Menu to see available options
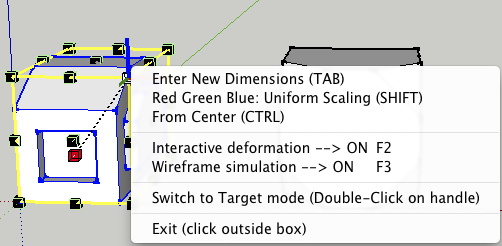
- After you selected the dragging handle you can:
- Drag the handle
- Type scale(s) as float numbers, positive or negative then press ENTER/RETURN You can use a formula in the input box, but you cannot include spaces because space or a semi-colon are valid separators when specifying several scales. The
plugin supports both , and . as the decimal separator:
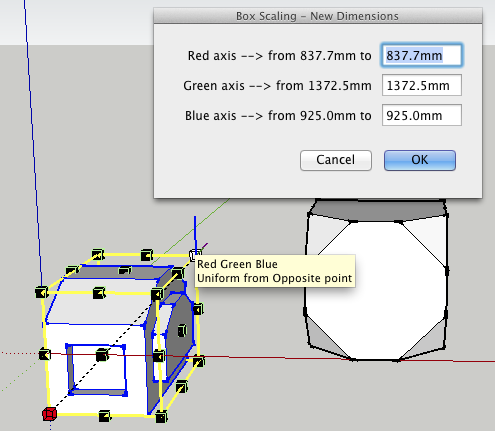
- Call the Box dimension dialog box by clicking on a handle then pressing TAB. This allows you to set
the dimensions in the directions allowed by the type of
handle you selected. You can also use formulas in this dialog box like 200*2+30mm*5/3:
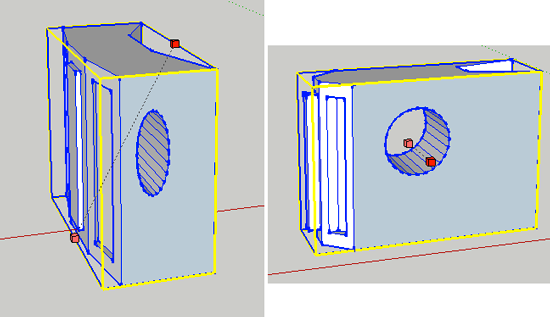
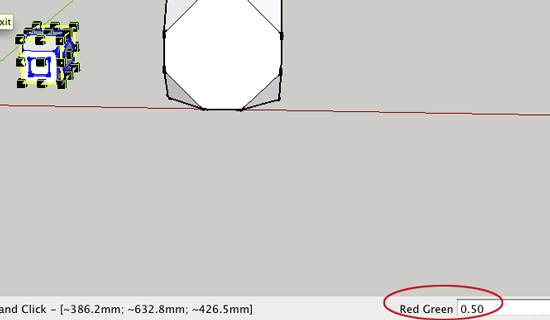
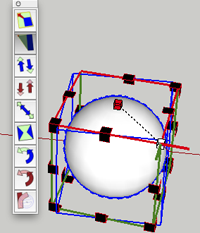
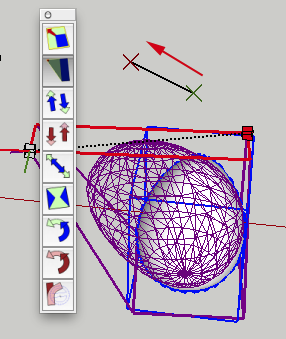
- Double clicking on a handle enables Target mode, which allows you to control the deformation. The first click lets you select the Origin, the Green Cross. When you move your cursor
your Target, a Red Cross moves along that axis. The Origin and Target can be located
almost anywhere in the model.

- Select the Taper scale, the second icon
 in the palette. Tapering is done by scaling one face of
the box. Mouse over the pads to select the face to scale and then
drag pad.
in the palette. Tapering is done by scaling one face of
the box. Mouse over the pads to select the face to scale and then
drag pad.

- To taper from center hold CTRL/OPTION, then drag:

- Double-click on a pad to enable Taper to Target
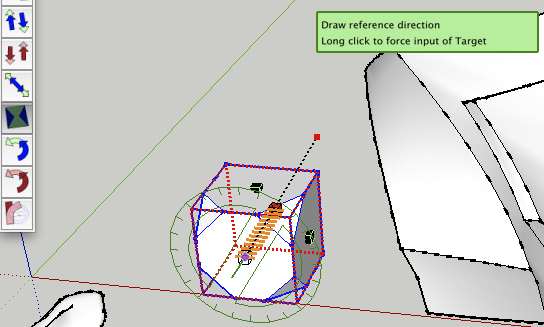
- Select the Box Twist Tool.
- Click on a rotational axis:
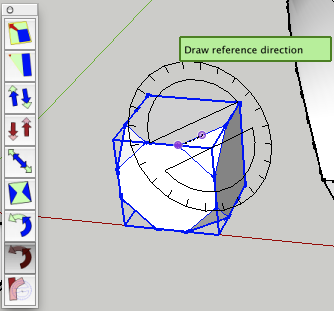
- Drag to pick a reference direction and click to select a Target:
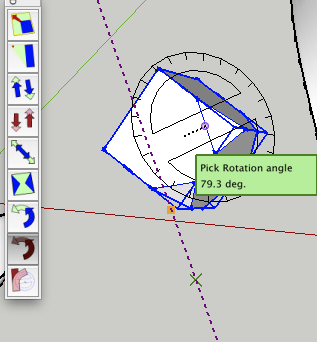
- Drag to pick a rotation angle:

- Click to set the deformation:

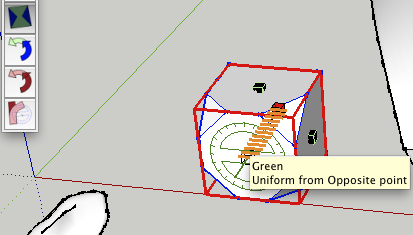
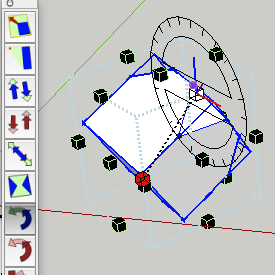
- Select the Box Rotational Tool.
- Click on a rotational axis:
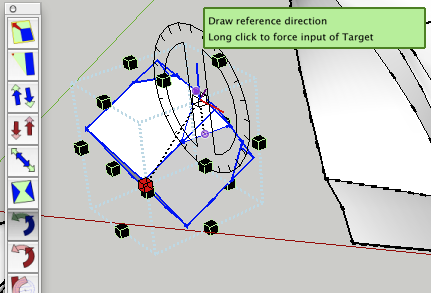
- Drag to pick a reference direction and click to select a Target:
- Drag to pick a rotation angle:
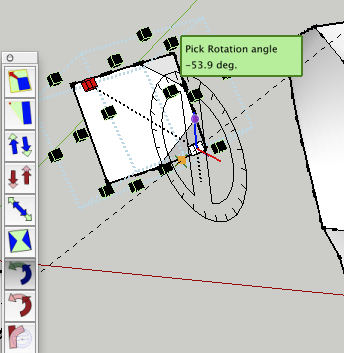
- Click to set the angle.
- Select the Free Rotational Tool.
- Click on a rotational axis:

- Click to set a reference direction:
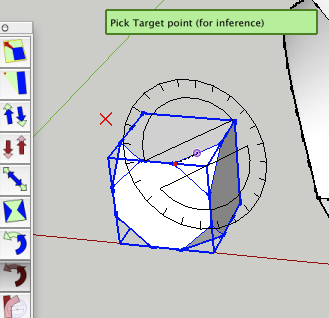
- Click to pick a Target point:
- Drag to pick a rotation angle:
- Click to set the angle.
- Experiment
.
Now what?
- Scale something!
