Introduction
Morphi is a 3D modeling and printing application originally created for touchscreens to enable 3D design without wifi or a mouse. With Morphi, a 3D visualizer, students can browse evolving libraries of shapes, text and colors and use simplified, but powerful modeling tools to create 3D models.
The Gallery
Morphi opens to a Gallery where 3D files are automatically saved and can be exported as STLs. To create a new model, select the plus (+) sign and a new workspace will open. To edit an existing model, click on the model and it will open for editing. Videos showing how to use Morphi's tools are available in the Guide.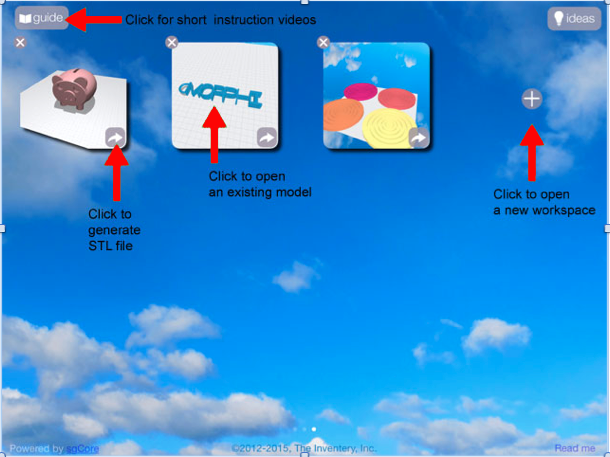
The Workspace
Morphi's workspace contains a movable grid and 3 main toolbars.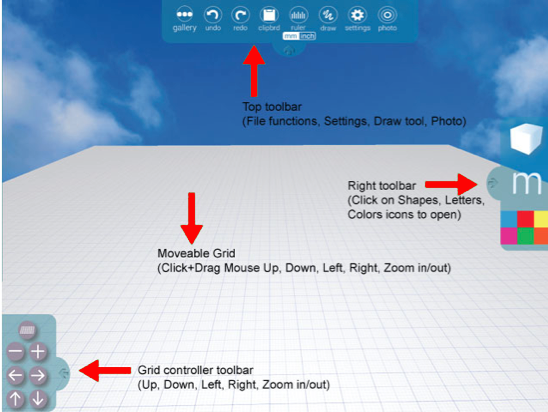
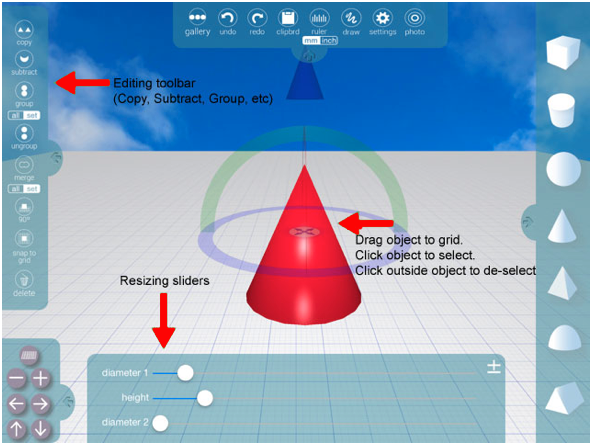
The Left Editing toolbar appears when a single object or group is dragged to grid and selected. When selected, Bottom Sliders pop-up so that you can change the dimensions and when applicable, the shape of an object. The Left Editing toolbar and Bottom Sliders disappear when the object or group is deselected.
The Toolbars
All of Morphi's toolbars can be hidden and unhidden at any time to maximize space for creating models.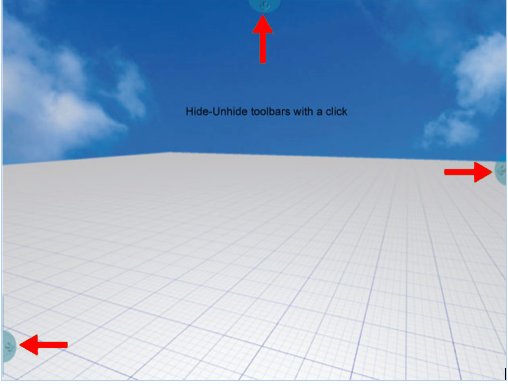
The Grid
Orientation is important in 3D space. You can familiarize yourself with the 3D workspace by clicking and dragging the grid to move it. You can also control the grid through the Grid Controllers on the bottom left of your screen. If you are ever lost or are turned around, click the Lost button to restore to the grid to the start position.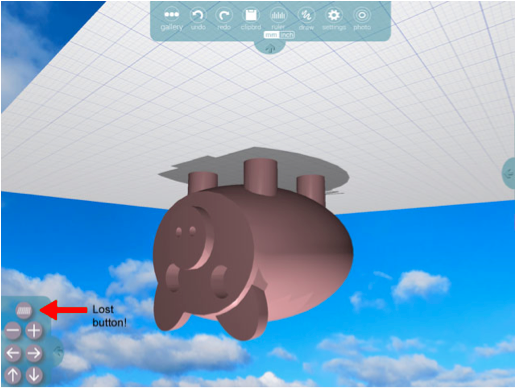
Editing
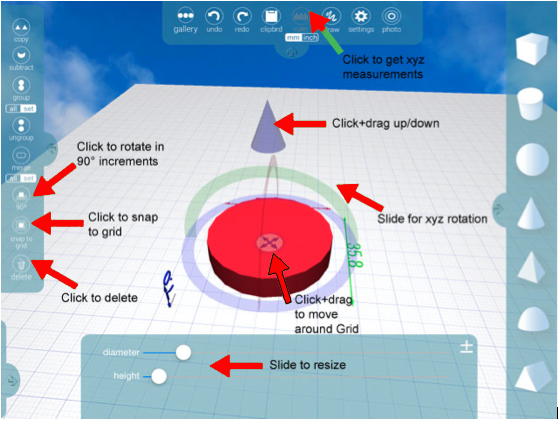
To create a model, open the Right toolbar and click the Shapes icon, scroll through the shapes and drag one onto the grid and click it to select it.Once selected you can:
- Move the object around the grid by putting your mouse on the Central Compass and dragging it around with your mouse
- Move the shape up and down using the Arrow
- Resize using the Bottom Sliders
- Measure (m/in) by clicking the Ruler on the Top Toolbar
- Rotate by dragging the Rotation Arcs or by clicking the 90 Degree Button
- Snap to Grid or Delete by clicking those buttons
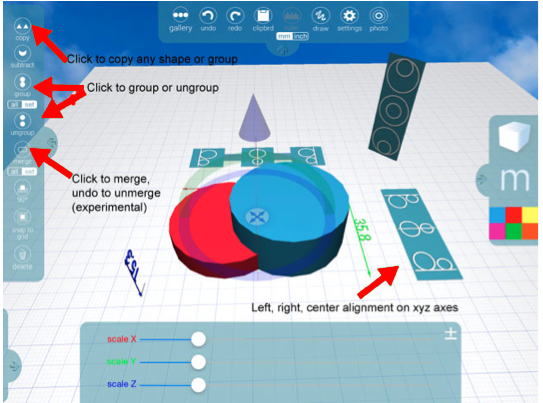
Once selected, you can also Copy a shape. If you have 2 or more shapes, you can:
- Align shapes on x, y, z axes by selecting all shapes and clicking left, right or center icons as desired
- Group one shape into another by positioning the shapes to be grouped and clicking Group. Click Ungroup to undo grouping.
- Merge one shape into another by positioning the shapes to be merged and clicking Merge. Click Undo (Top toolbar) to unmerge.
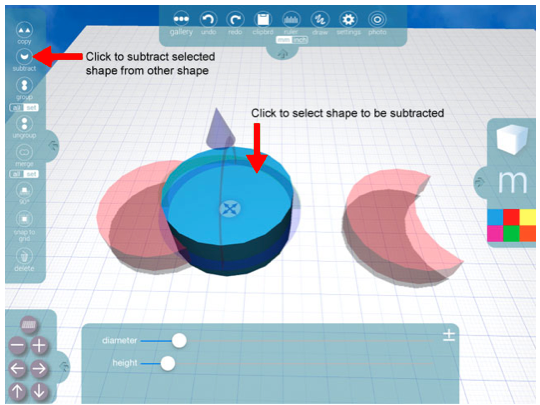
 Subtract one shape from another by positioning the shape to be subtracted and clicking
Subtract.
Subtract one shape from another by positioning the shape to be subtracted and clicking
Subtract.
Color
Add color to any shape or group by selecting the shape, opening the Color tools in Right toolbar , scrolling to find your desired color and clicking that color.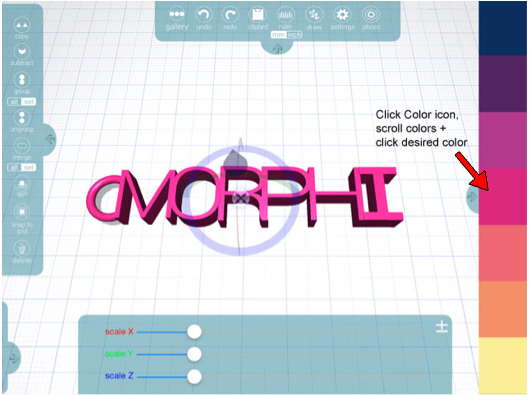
Instructions
Launch Morphi and use the tools to create a series of interlocking blocks that can be functional, artistic or both. Use any of the shapes and as many or as few as you want. Design your blocks so that each has a cutout so that they can be fitted together (almost like puzzle pieces) in various combinations. Use the Ruler so you can make sure the sizing of the cutouts is accurate because they will need to fit together. When you're done, position them in the workspace to show how you would fit them together.Here is an example:
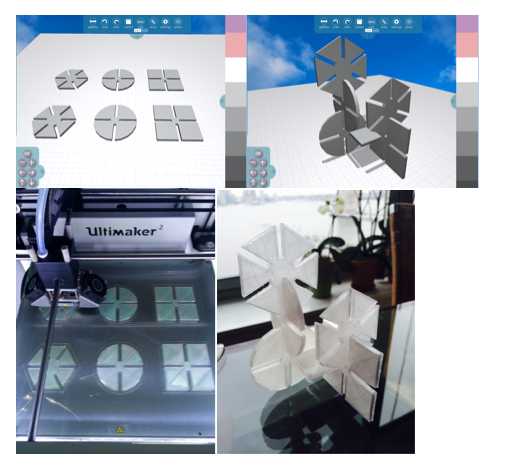
Source: Tutorial created by www.morphiapp.com