TinkerCad
Small Box
This tutorial will show you how to create a simple cylindrical box in two parts. The top of the box is designed to fit in the box.- Open Google chrome, or another webGL enabled browser.
- Navigate to Tinkercad.com.
- Sign in using your username and password or sign up.
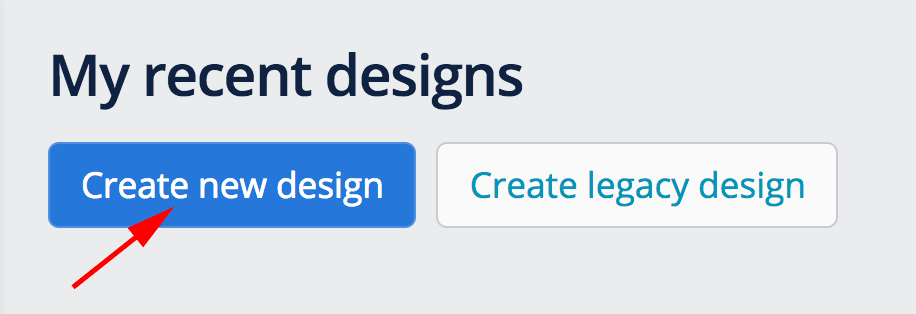
- Click on the Create new design button:
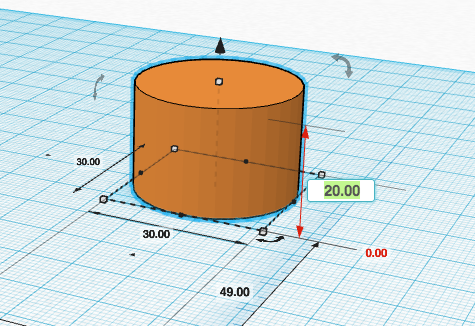
- The first part to design is the cap. Make a cylinder 30 x 30 x 20.
There are 2 ways to do this:
Option 1
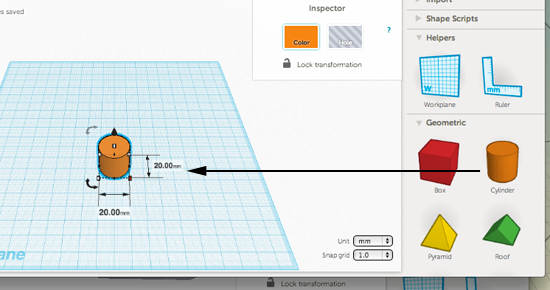
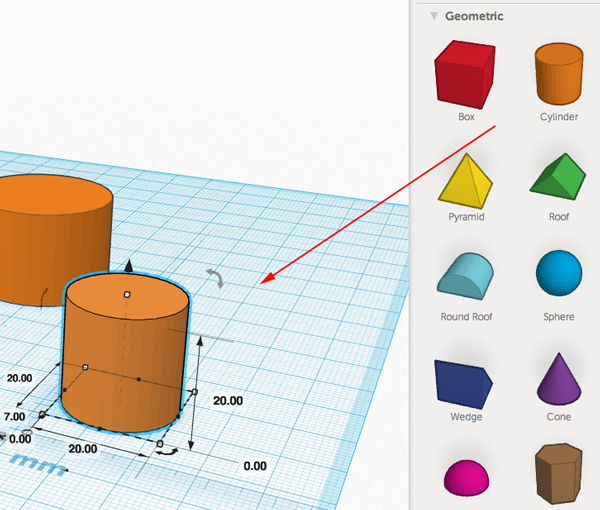
- Drag a cylinder from the left on to the workplane:
- Drag the node out to adjust the x and y dimensions:

Option 2
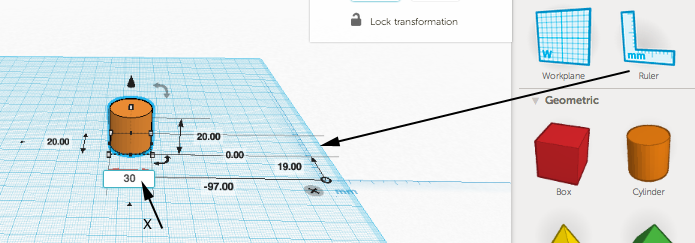
- Drag the ruler on to the workplane and adjust the x value first. Press tab to make the next adjustment
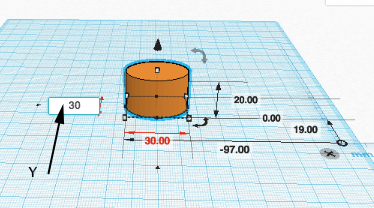
- Press tab to make the next adjustment:
- Press tab to make the next adjustment:
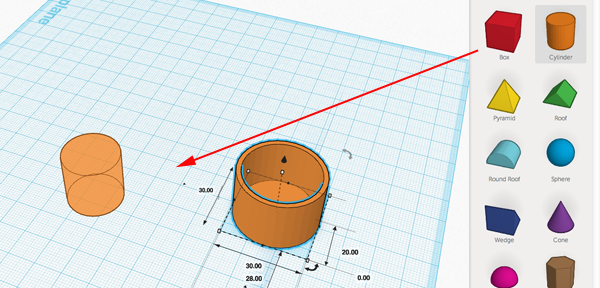
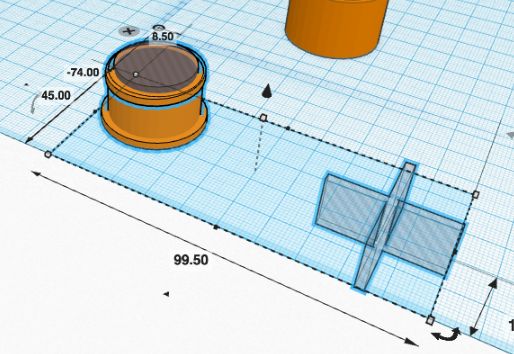
- Drag a cylinder from the left on to the workplane:
- Drag another cylinder on to the work plane. This will become the hole:
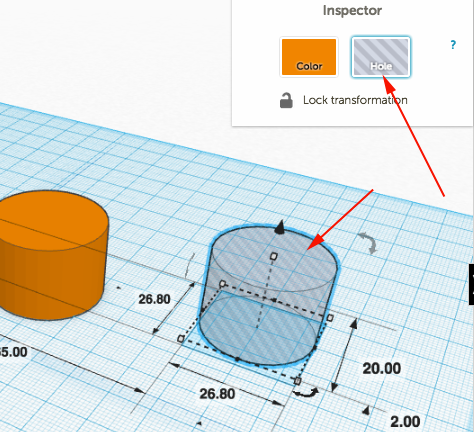
- You want a wall thickness of the box to be 1.6mm. So 2 x 1.6=3.2 and 30-3.2=26.8.
Set the x to 26.8, the y to 26.8 and the z to 20:
- Click and drag the black cone so that the cylinder raises 2mm off the workplane:

- Click on hole icon to turn the cylinder into a hole:
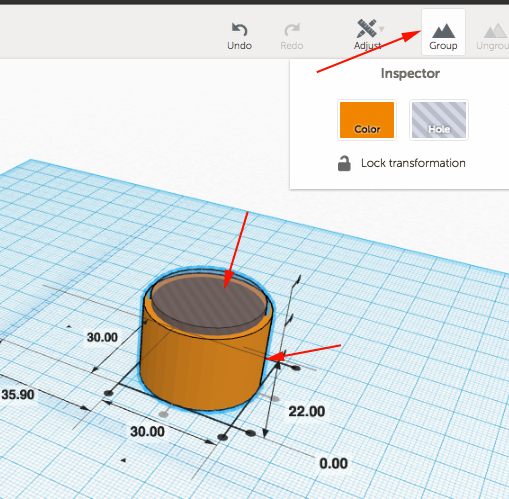
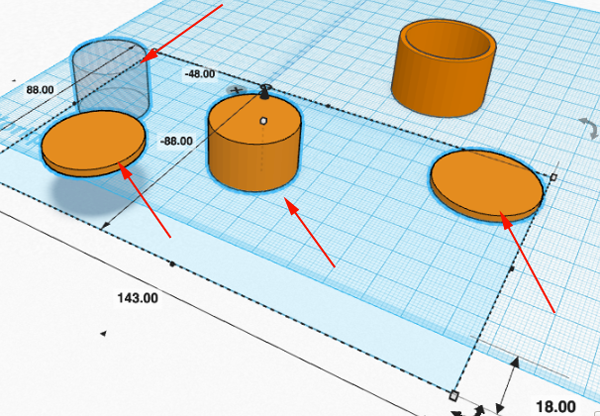
- Select both cylinders:
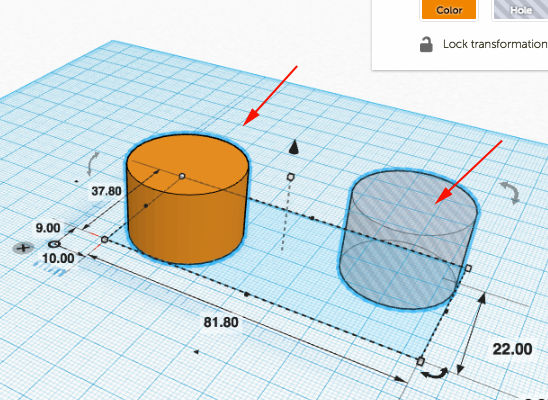
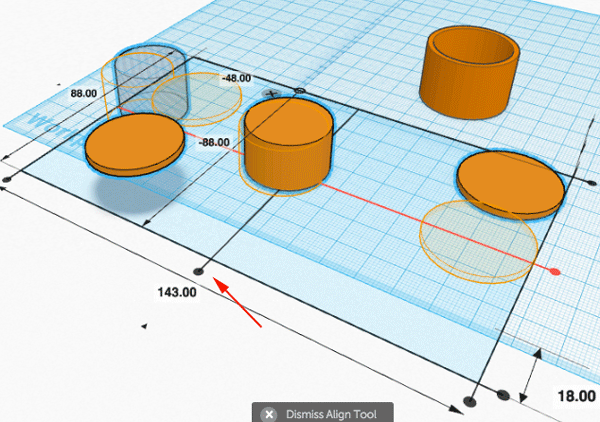
- Click on Adjust and select Align:

- Click on the center nodes to align the objects:

- Make sure both cylinders are selected then click on group to make the hole:
- Drag another cylinder on to the workplane:
- Set the x to 30, the y to 30 and the z to 2. This will be the base of the top:

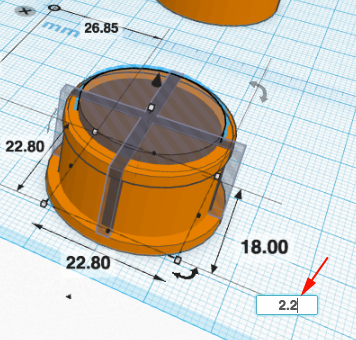
- Drag another cylinder and set the x to 26, the y to 26 and the z to 16. This will be part of the top.
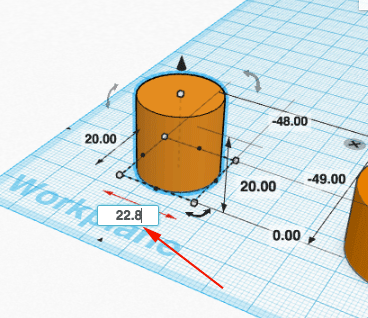
- Drag another cylinder onto the workplane. This will become a hole in the top. Set the x to 22.8, the y to 22.8 and the z to 18:
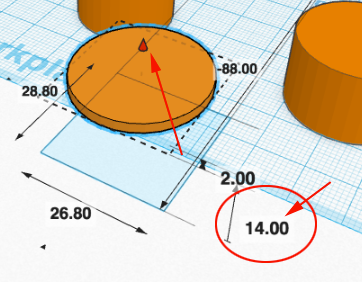
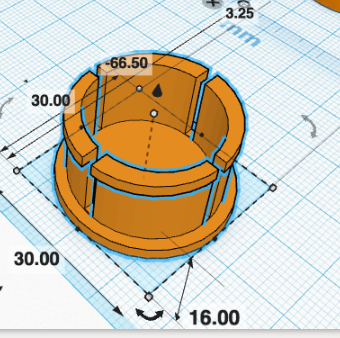
- You need to create a rim on the top for friction. Drag another cylinder out and set the x to 26.8, the y to 26.8 and the z to 2:

- Click on the black cone and drag up until this disc is 14mm off the workplane:
- Select the last four cylinders by Shift+left clicking each of them:
- Align the cylinders:
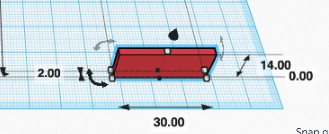
- Drag a cube onto the workplane and set the x to 30, the y to 2 and the z to 14:
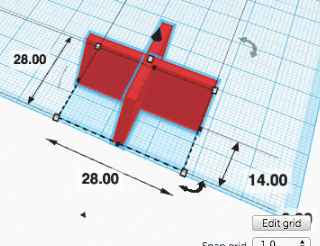
- Make a duplicate of the cube by pressing Command+D.
- Rotate the duplicate 90° (hold the SHIFT key while you rotate to confine the move to 45° increments):
- Convert the two cubes into a group and then into a hole. Raise the hole up 2.3mm:

- Align the cross with the cylinders:
- Raise the central cylinder (the hole) up 2.2mm:
- Select and group all the pieces of the cap to convert the cross and central cylinder to holes:
- Use the align tool to align the top and the bottom parts of the box. Then move them closer to each other:

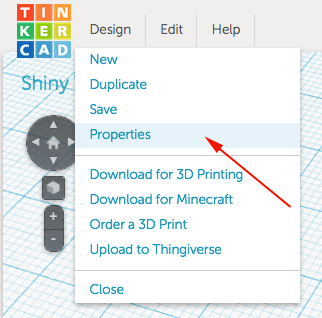
- Select Properties from the Design Menu:
- Rename the model something that is more meaningful to you then the randomly generated name:

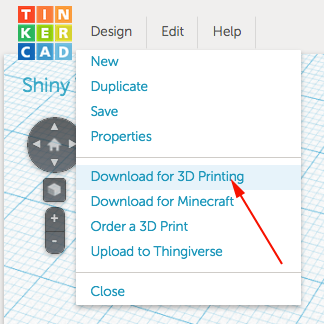
- Select Design→Download for 3D Printing
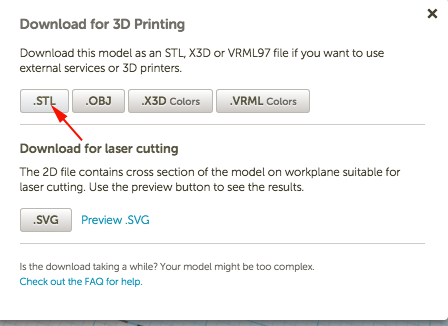
- Select STL
- Print!
