3D Printing Topographical Maps
Grades 9-12
-
 Art
Art
 Math
Math Social Sciences
 Interdisciplinary
INTRODUCTION
One powerful application of 3D printing is the ability to create tangible objects that help students visualize information.
While not a simple process it is much easier to process topographical data and convert it to a 3D Printable file on a PC than a MAC. For information on how to do this on a PC see
Maps to 3D. The process becomes a bit more complicated on a MAC. This tutorial's purpose is to provide a workable option for MAC users.
LESSON PURPOSE
- Be able to create topographical maps on a MAC.
MATERIALS
- 3D printer
- Access to the internet
- Applications: Browser, QGIS, OmNomNom, Photo Editor, OpenSCAD, NetFabb, a Slicer
RESOURCES
STL Generator
Terrain2STL is a web-based application that converts publicly available HGT files (Google Maps)
to STL files.
You can use the website or download everything from
Github and start the server with:
It will run at localhost:8080.
A few .HGT files are included, but not the whole set. You can get the rest from the USGS.
The application transforms this:
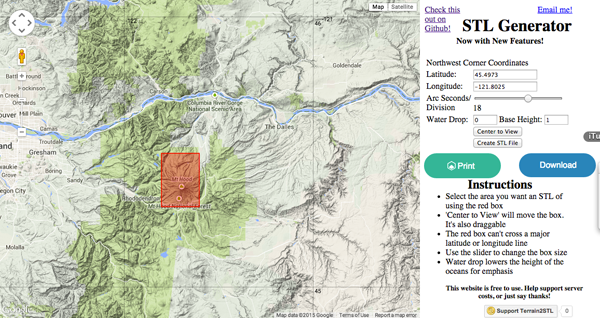
to this:
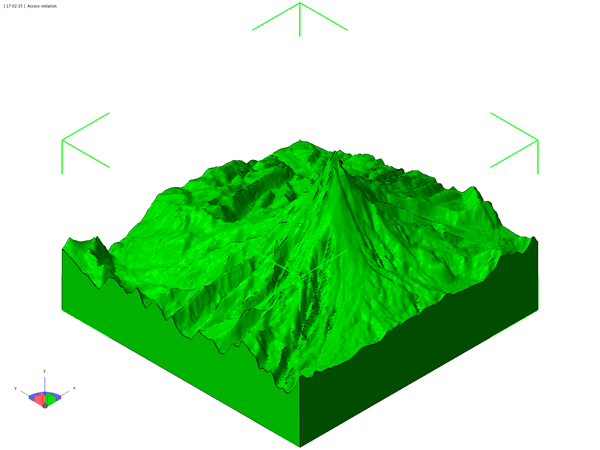
I suggest that before printing, pass the STL file through Netfabb to check for errors.
Downloads
- QGIS is a free and Open Source Geographic Information System that allows you to create, edit, visualise, analyze and publish geospatial information on multiple platforms.
Download and install the dependencies and then the Quantum GIS application.
- OpenSCAD is a software for creating solid 3D CAD objects.
Download and Install the development snapshot of OpenSCAD
- Download OmNomNom
- Download MeshLab
WorkFlow
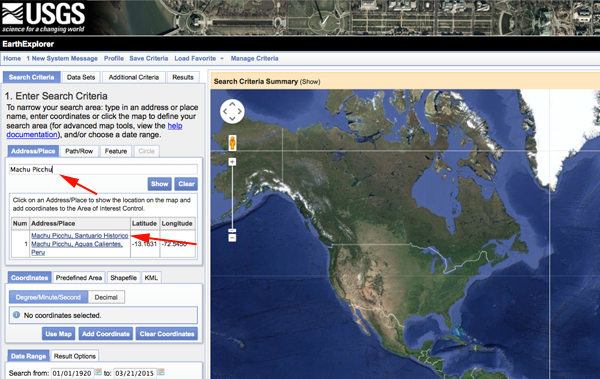
- Navigate to earth explorer.
- Create an account or sign in. You will need to be signed in to download files.
-
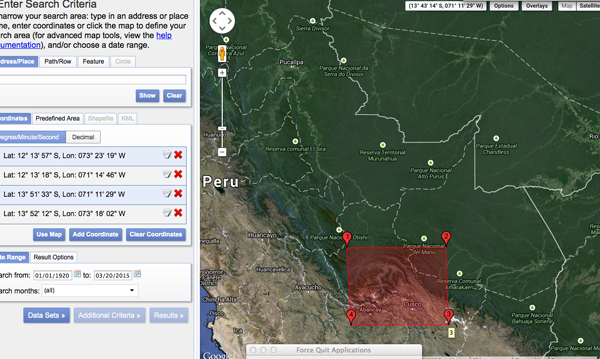
Enter an area for Search Criteria.
- Zoom into to selection.
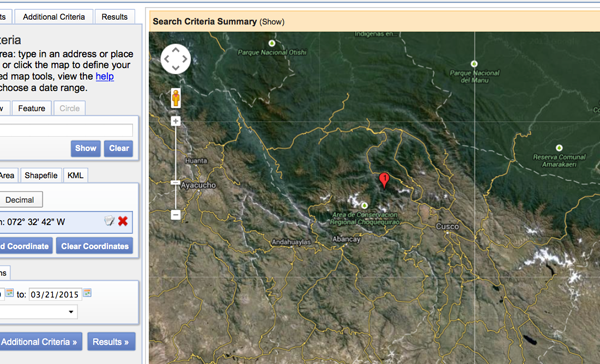
- Under Coordinates click on the red X, then click on the map to create a selection.
-
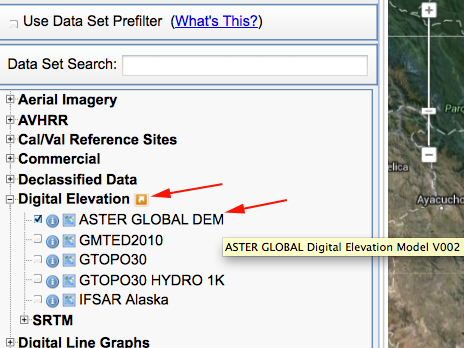
Navigate to Data Sets and click on Digital Elevation and select Aster Global DEM.
-
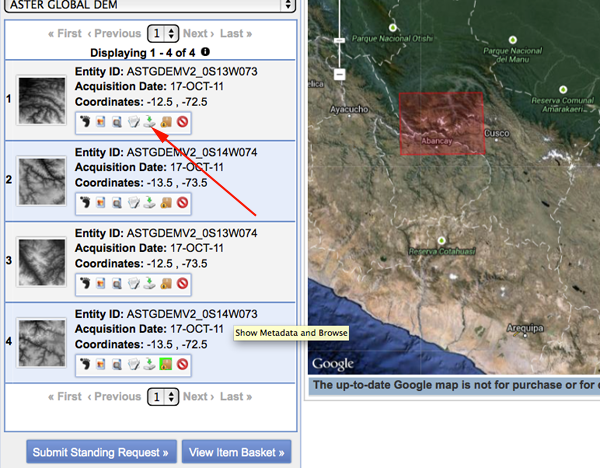
Navigate to Results

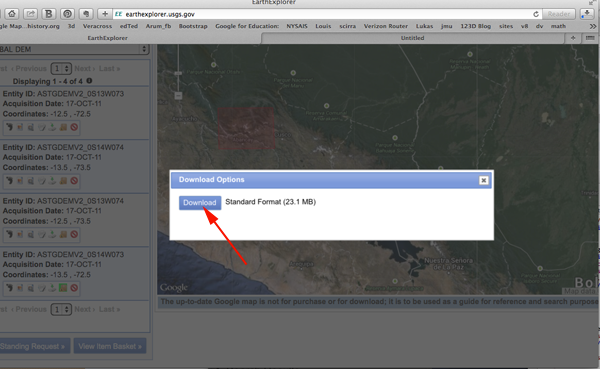
- Download the files.
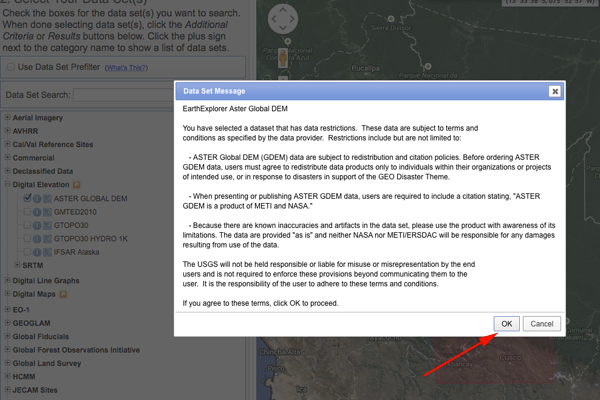
- Agree to restrictions:
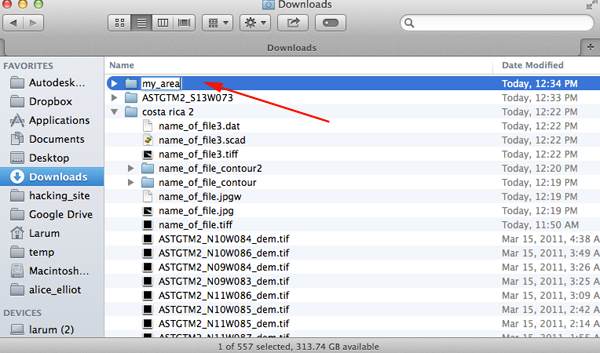
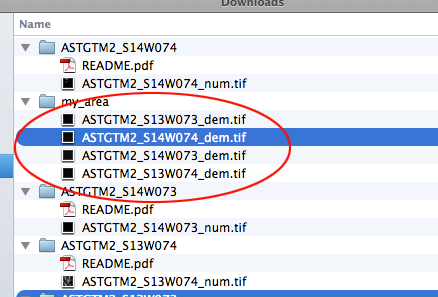
- Once downloaded, created another folder to hold just the DEM files.
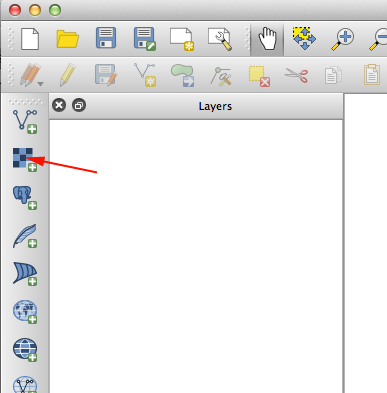
- Open QGIS
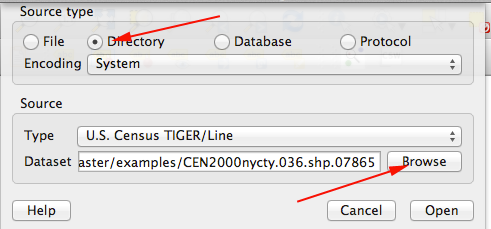
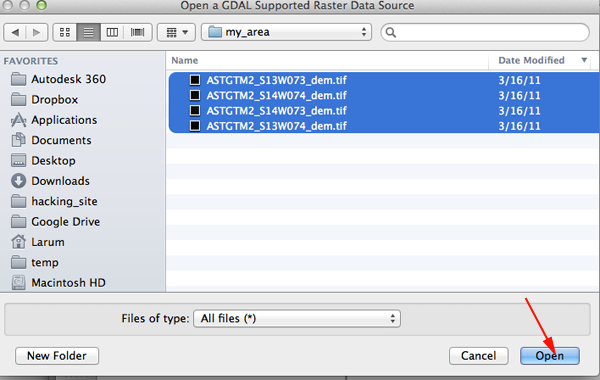
- To open the DEM files click on the Add Raster Layer icon.
- Click Directory then Browse under Source and select your DEM directory:
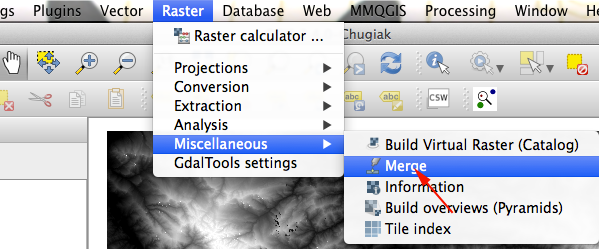
- You will need to merge your multiple DEM files into a single file. To merge raster files, click on Raster→Miscellaneous→Merge.
- Select the folder with your raster files for input
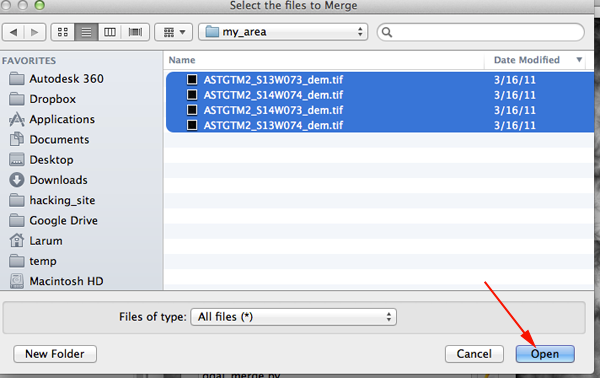 .
.
- Save your output file on you computer with the tiff extension.
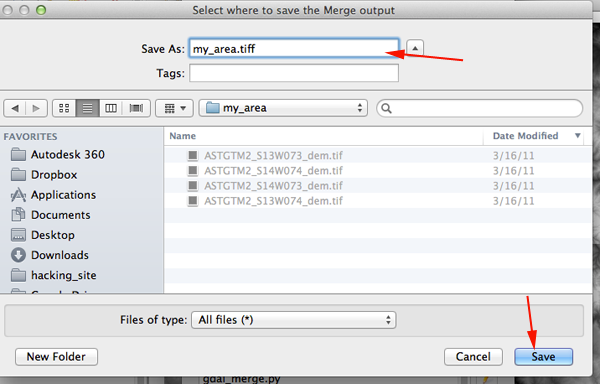
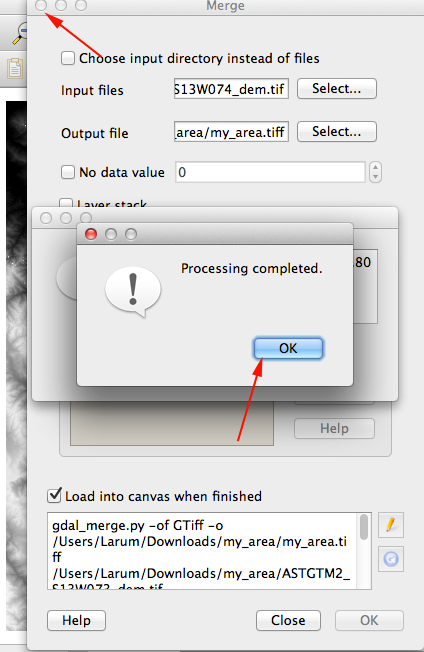
- Click OK.
- When the process is completed close the popup windows.
- Select Layer→Properties
Change Min to 0
Set Current to Extent
Set Contrast enhancement to Stretch to Min/Max
Set Load to Min/Max
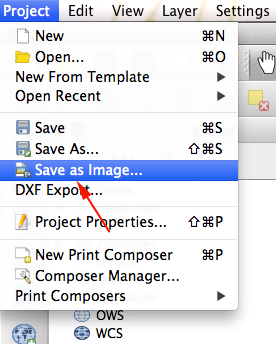
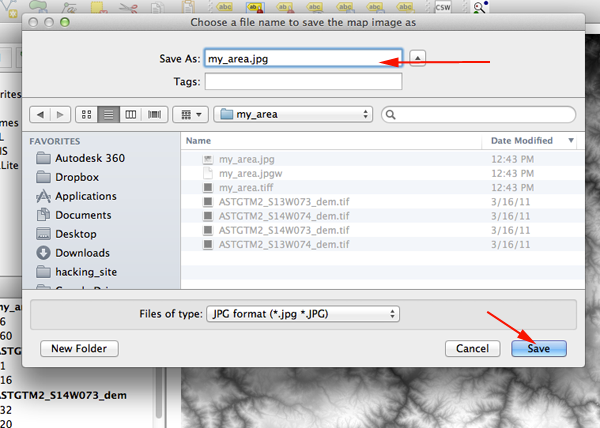
- Select
Project→Save Image As and save the image as a JPEG.
- Open the jpg file in Photoshop or another image editing application.
- Crop out the white border and save
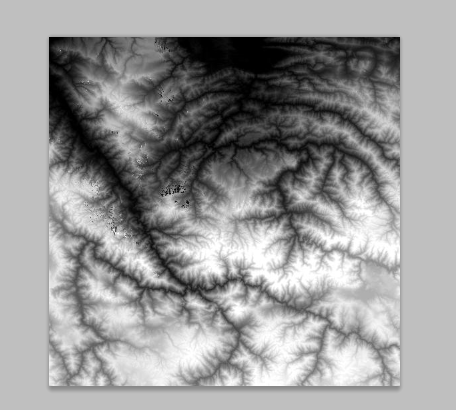 .
.
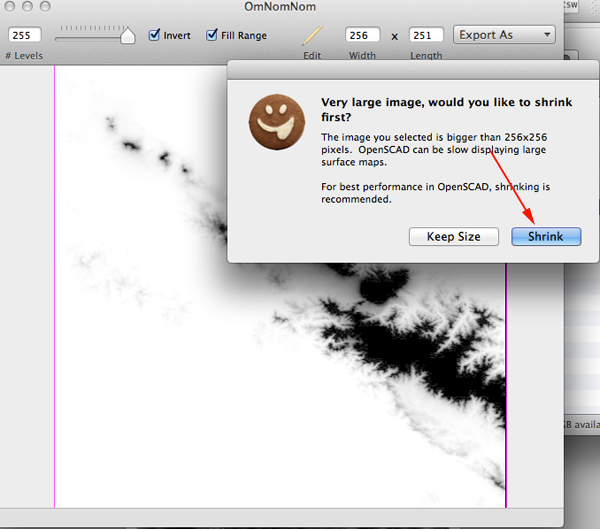
- Open OmNomNom and drag the cropped jpg into the application.
- Click on Shrink.
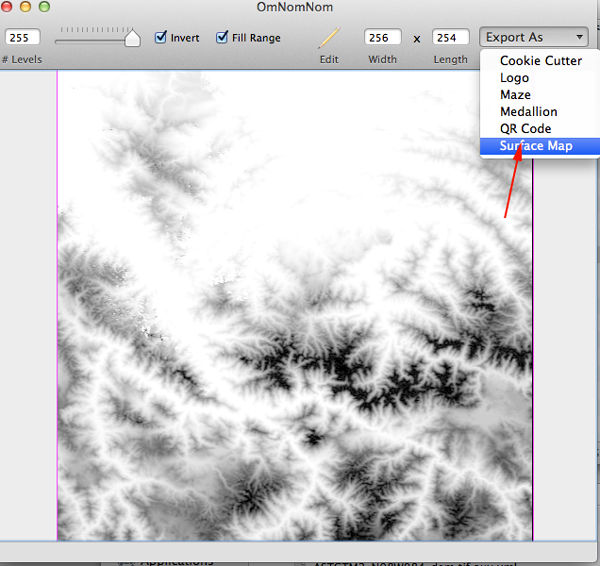
- Set:
•levels to 255
•enable Invert
•disable Fill Range.
- Export as a Surface Map.
- OpenSCAD will open with the newly created scad file.
- In OpenSCAD press F5 to preview.
- Press F6 to create mesh (this will take time, be patient)
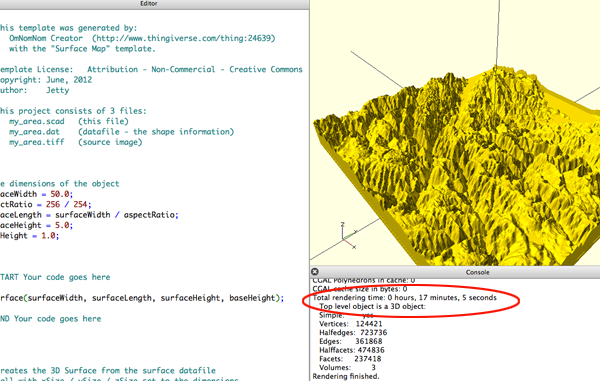
- Once the mesh is created export as STL File→Export→Export as STL..
- The file will be large and you should open it in MeshLab to reduce the number of faces.
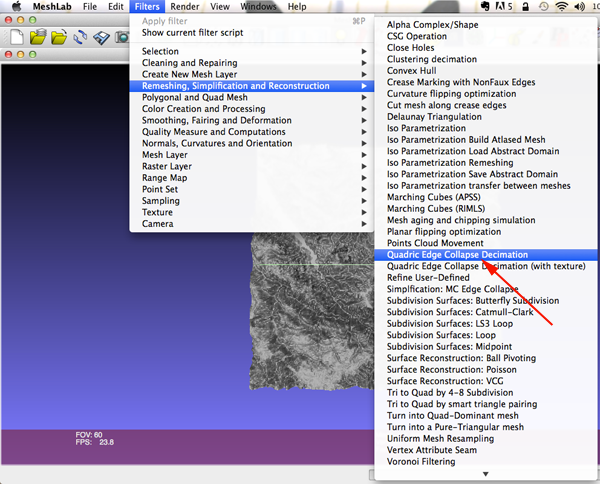
- Select Filters→Remeshing, Simplification and Reconstruction→Quadric Edge Collapse Decimation
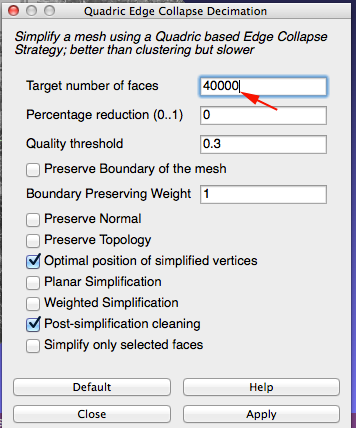
- Set the target faces to 40000 and press Apply.
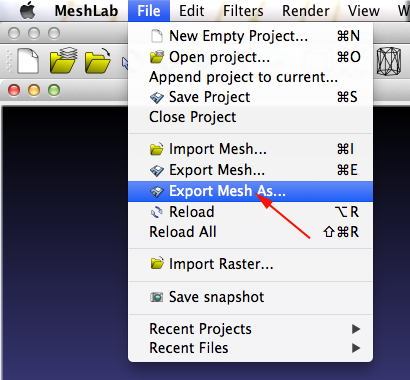
- Click on Save Mesh As and export as an stl file.
- Slice and print.
heightmap2STL
- Download heightmap2STL
- Navigate to earth explorer.
- Create an account or sign in. You will need to be signed in to download files.
-
Enter an area for Search Criteria.
- Zoom into to selection.
- Under Coordinates click on the red X, then click on the map to create a selection.
-
Navigate to Data Sets and click on Digital Elevation and select Aster Global DEM.
-
Navigate to Results
- Download the files.
- Agree to restrictions:
- Once downloaded, created another folder to hold just the DEM files.
- Open QGIS
- To open the DEM files click on the Add Raster Layer icon.
- Click Directory then Browse under Source and select your DEM directory:
- You will need to merge your multiple DEM files into a single file. To merge raster files, click on Raster→Miscellaneous→Merge.
- Select the folder with your raster files for input
.
- Save your output file on you computer with the tiff extension.
- Click OK.
- When the process is completed close the popup windows.
- Select Layer→Properties
Change Min to 0
Set Current to Extent
Set Contrast enhancement to Stretch to Min/Max
Set Load to Min/Max
- Select
Project→Save Image As and save the image as a JPEG.
- Open the jpg file in Photoshop or another image editing application.
- Crop out the white border and save
.
- Open terminal.
java -jar path to heightmap2stl.jar path to imagefile height of model height of base
