Autodesk® 123D® Creature is an iPad app that lets you quickly create 3D characters by pushing and pulling a starting shape. What differentiates Creature from Sculpt is that Creature lets you use armature. You can enlarge, shrink, warp, or refine your creation and upload it to your 123d app account so that you can download and print it.
- When you start, the default function is Create. Create
 allows you to click on the model to add armature. You can click to add a joint, or click and drag to create and position a new limb.
 - Your creature is built symmetrically. If two joints start to form when adding to your creature's spine, drag them towards each other until they snap together.
- Clicking on a Joint with the Create tool selected gives you another context specific menu. You can delete the the joint, cut and paste it
- Drag one finger anywhere off the shape to navigate around
- Drag two fingers on your shape to pan.
- Pinch fingers or move fingers apart to zoom in and out.
- Clicking on the arrow in the lower left allows you to undo. Creature provides for multiple undos.
- The Move tool
 allows you to move a joint and reposition it.
 - The Shape
 tool allows you to increase or reduce volume (thickness). I like to increase volume so that I have more to work with later.
 - The Scale
 tool allows you to scale a limb.
 - The Pose tool
 allows you to select a joint and rotate the whole limb. This will come in handy to create expressive creatures.
 - When you have the basic form

©Autodesk
and you are ready to sculpt, click on the Bake Skeleton in the lower right corner. (This process takes a few moments). When it is finished, you can add details - Once you have a model select Sculpt:
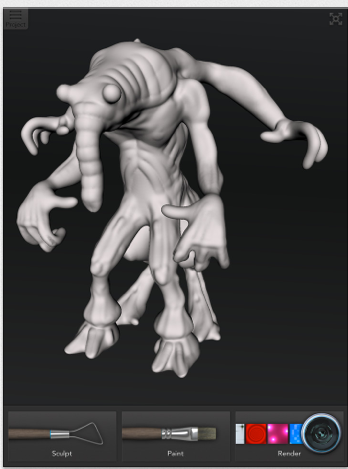
©Autodesk - Drag one finger on your shape to sculpt or paint
- Most of the tools are self explanatory, but Sharpen needs an edge for it to work.
- Twist two fingers to rotate shape.
- Use setting bar to adjust brush size and strength.
- When you have added your details, click Export Mesh
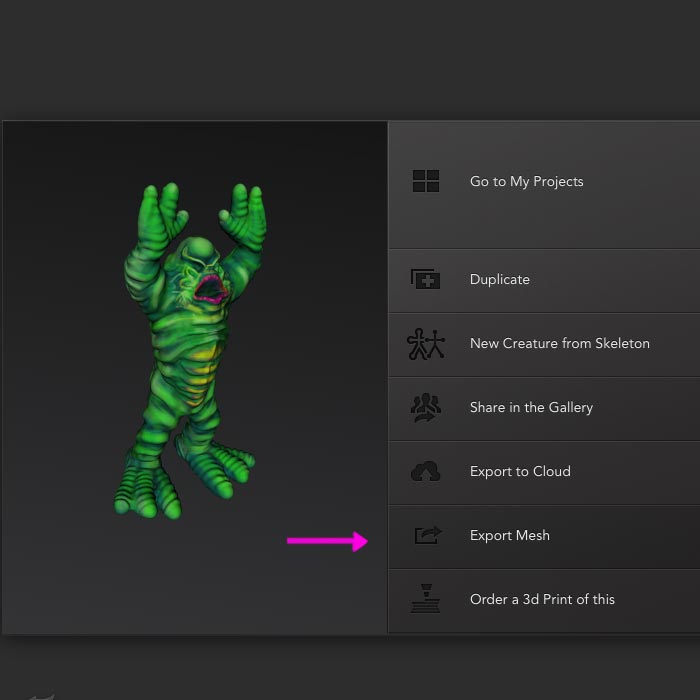
Image from MakerBot - Give it a name and select
Email File and send it to yourself.

Image from MakerBot - Check your email,
Download and unzip the files then rename the .obj to your desired filename, as it will automatically be named sculptshape.obj.
- Click here to see how Designers edit with MeshMixer.
- Open Blender.
- Press X to delete the cube. Click on Delete.
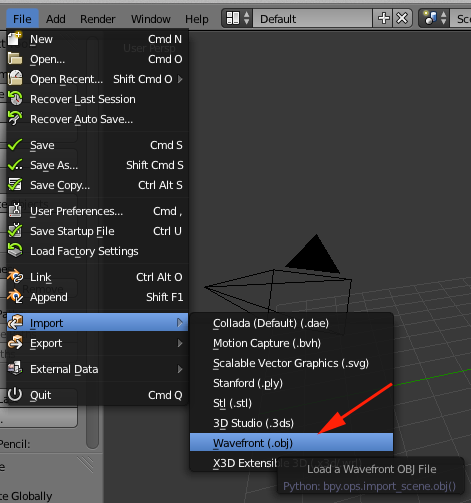
- Click on File>Import>wavefront (.obj) to import the obj file.

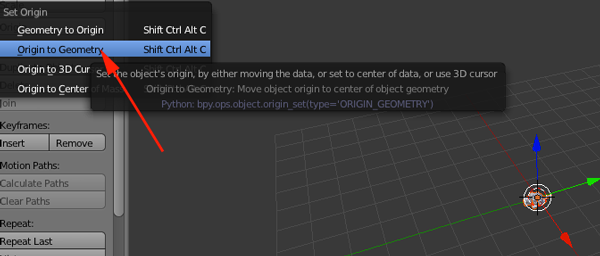
- Click on Origin and select Origin to Geometry
- Zoom in.
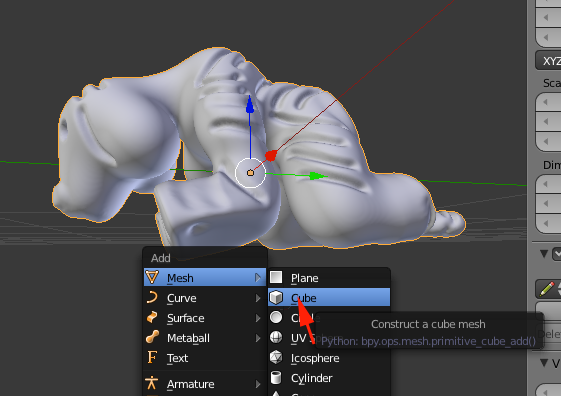
- Add a Cube (SHIFT+A>Mesh>Cube
).
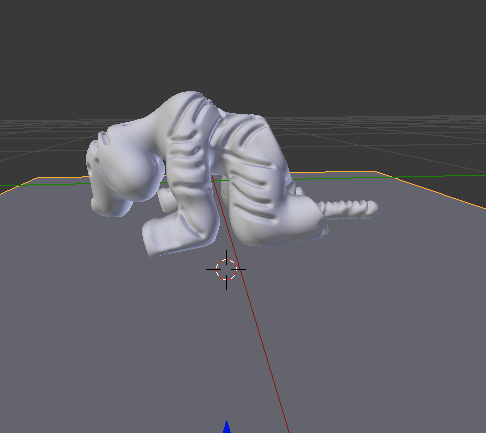
- Press S for scale and scale up the cube so that your creature rests on the surface. You can also use G and Z to move the cube up and down. You are going to use the cube to slice off the bottom of the creature.
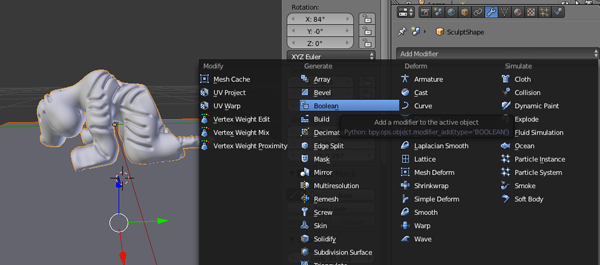
- Once it is positioned properly and the cube is still selected, RIGHT+click on the creature to add to the selection.
- Select the Wrench, Add Modifier and then Boolean
- Select Difference
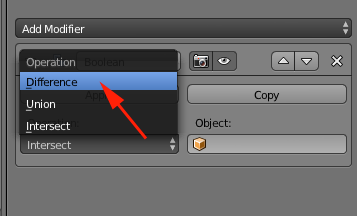
- Select Cube from the drop down
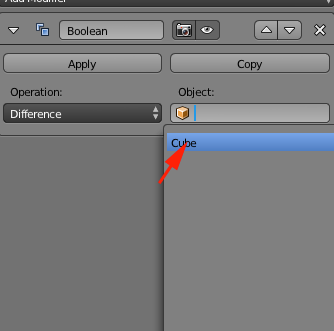
- Select Apply.
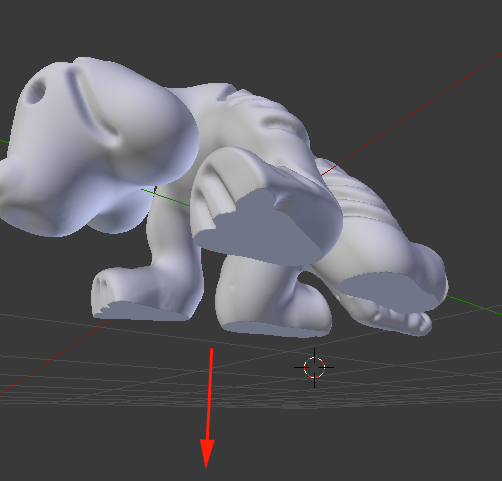
- RIGHT click on the cube and press G and Z. Move the cube down. You should have a flat bottom:
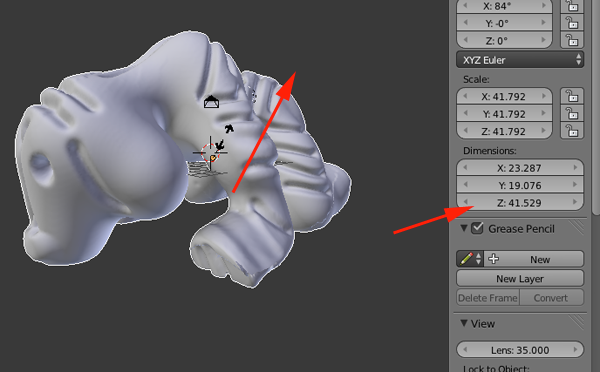
- Press N to open the properties window.
- Look for dimensions. RIGHT click on your creature and press S to scale. Drag away and enlarge your creature so that your largest dimension is about 50.
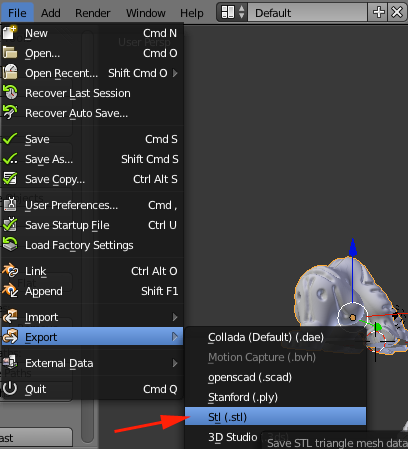
- Export your file from Blender. Go to File>Mesh>stl You could also export as an .obj, but we recommend .stl.
- Open your file in MakerWare and make it.
From
By 123DCreatures
