Inkscape to OpenSCAD
See also Tony Buser's 2d to 3D tutorial
InkScape to OpenSCAD
- Open Inkscape (www.inkscape.org — free, open-source vector based drawing program ) and create a new document (CTRL+N).
- Under the file menu, go to Document Properties and change the default units in the upper right hand corner to inches (SHIFT+CTRL+D). This will change the rulers from pixels to inches.
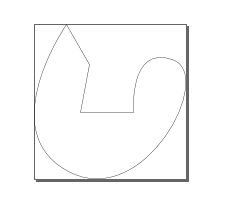
- Create a drawing
- There should be square and round handles on the object, which indicates it is an .svg object, which OpenSCAD can't read.
- You need to convert it to a path. [Shift+Ctrl+C]
- Select the node tool [N]. The handles on the object now look like gray squares. This indicates you have a path.
- With every node selected, click on Insert new nodes into selected segments.
Press a few times if you want a smoother object, but don't overdo it.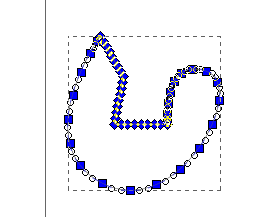
- Click Make selected segment lines.
This looks much better. The lines are straight, but due to the sheer numbers, you see a curve!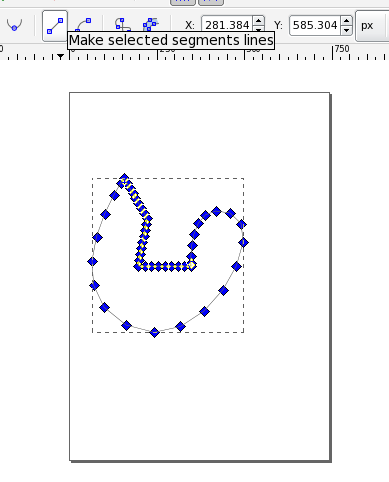
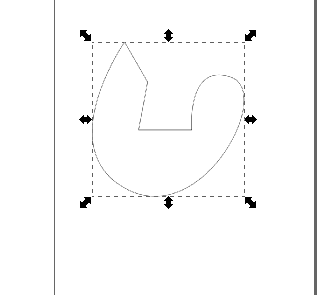
- Select everything, then go to Document Properties [Shift+Ctrl+D] and Fit page to selection.
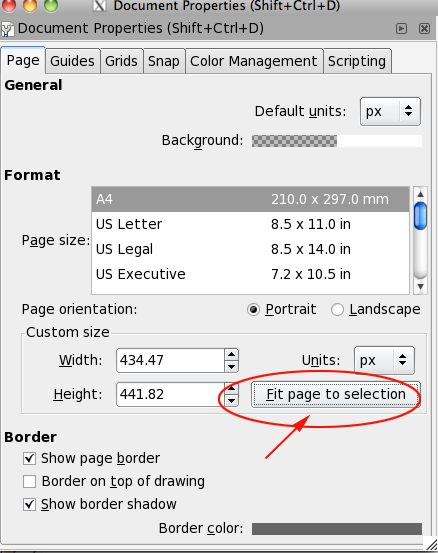 You might see this, don't panic:
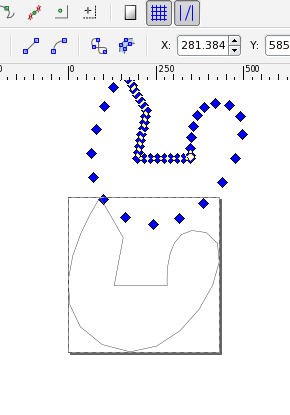
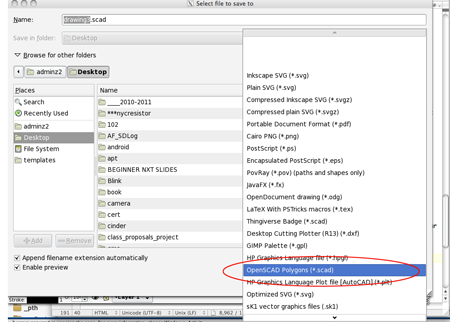
- Now save the file as something.dxf. You will need to select Desktop Cutting Plotter (R13) in the type drop down box.
The dialog HELP box tells you that you can only export certain elements—lowpolylines, which will export.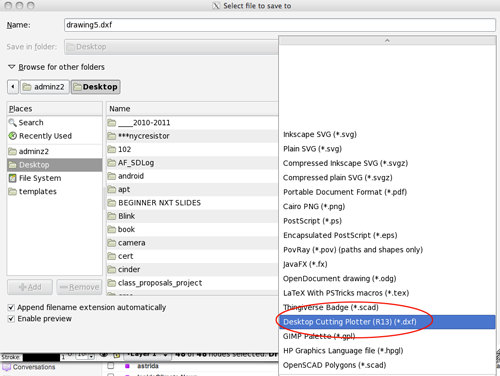
- Save the file in the same folder that you will save your openSCAD file
- Take care not to overwrite your original .svg file if you want to be able to edit things later. It's much easier to work with objects than paths.
- Open OpenSCAD (Remember to put the .scad and .dxf file in the same directory).
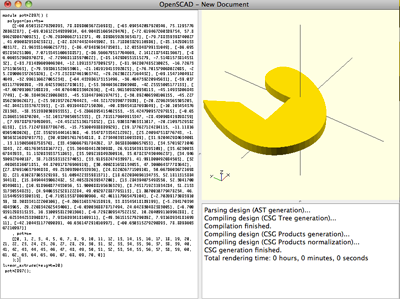
- Here is the code
linear_extrude(file = "something.dxf", height = 10, center = true); - You can export several .dxf files and combine them in OpenSCAD. If you use different paths, remember to union the different paths.
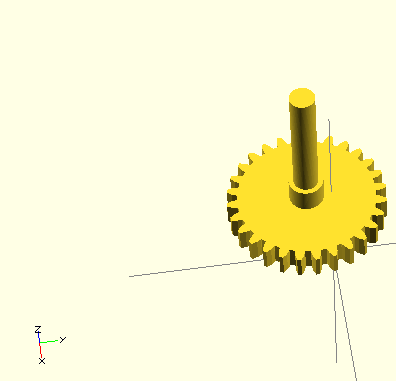
- Add a cylinder in the center of the gear so that use can attach it to a base. You could make a 1/4" dowel (6.35mm). Or attach Tony Buser's pin connector to the end of your dower. In that case your radius will be 5.
- Compile and export
- Open the .stl in NetFabb and repair if necessary
- Open in ReplicatorG and print