Motion Lab
Motion Lab is about communication. You might have the most
brilliant idea in your head,
but unless you can share it, it remains in your head.
How can you get things out of your head?
- You can tell someone your idea by talking to them.
- You can tell someone a story about your idea either by talking or writing it down:
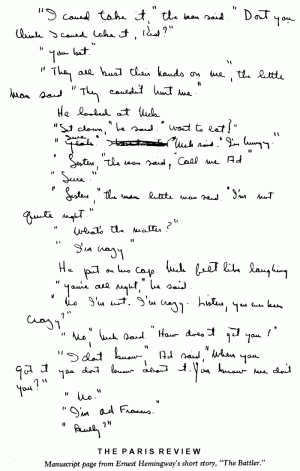
Page of Ernest Hemmingway's manuscript
- You can draw your idea:
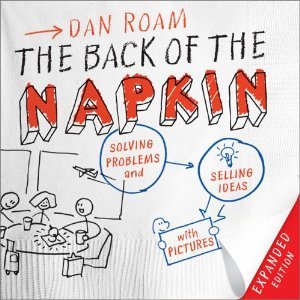
Image from The Back of The Napkin by Dan Roam
- You can prototype your idea (build it in 3 three dimensions)

Disney Research
- You can photograph something that illustrates your idea
- You can create a video that illustrates your idea
Basically, ultimately, what you want to do is share your idea. You can work on your own, but by sharing your idea or story, your concept or product can have a life of its own.
Making Movies
If you wanted to make a movie, how do you start?
- You have to start with an idea.
- Develop characters and plot.
- Create a storyboard.
- Gather characters, props and sets.
- Shoot the movie.
- Edit the movie.
- Share the movie.
Making Stop Motion Animations
Stop Motion is an animation technique where you physically manipulate objects so that they appear to move on their own.
If you wanted to make a stop motion animation, how do you start?
- You have to start with an idea.
- Develop characters and plot.
- Create a storyboard.
- Gather characters, props and sets.
- Fabricate characters, props and sets
- Shoot the movie.
- Edit the movie.
- Share the movie.
Some Inspiration
When fabricating characters, props and sets some can be 3D scanned and printed. Your job would be to determine what should be printed and what could be constructed.
If you are scanning, what resources are available to you? Which methods are appropriate to your particular model.
Introduction to Evernote
- Open Evernote
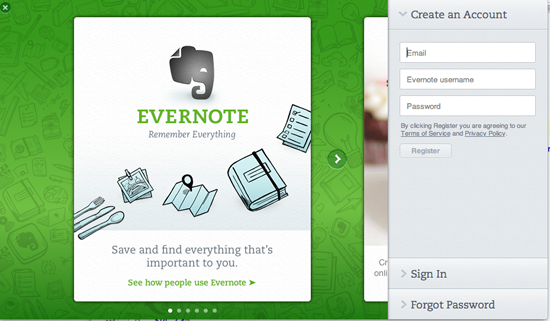
- Create an Evernote account or sign in:
- Create a notebook called Motion
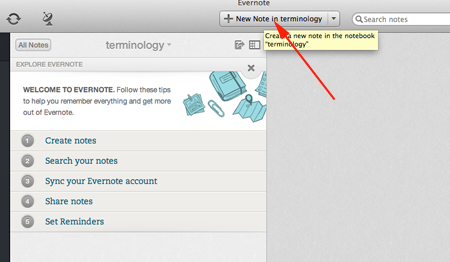
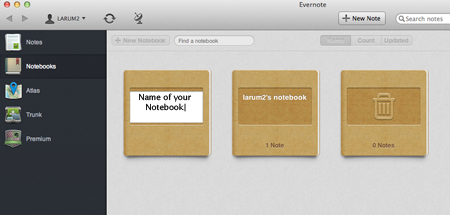
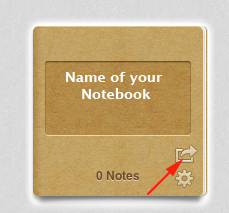
- Share the notebook with your instructor by clicking on the curved arrow:
- Click Invite Individuals:
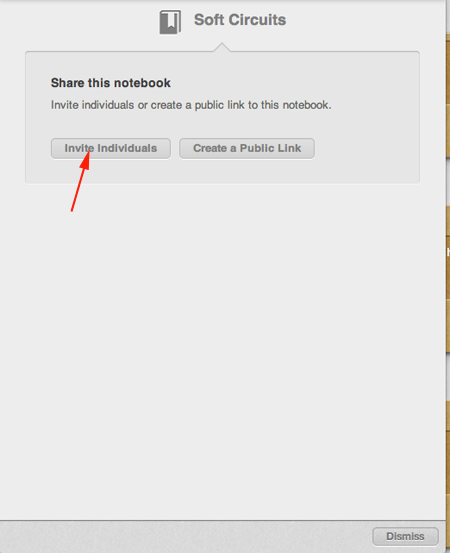
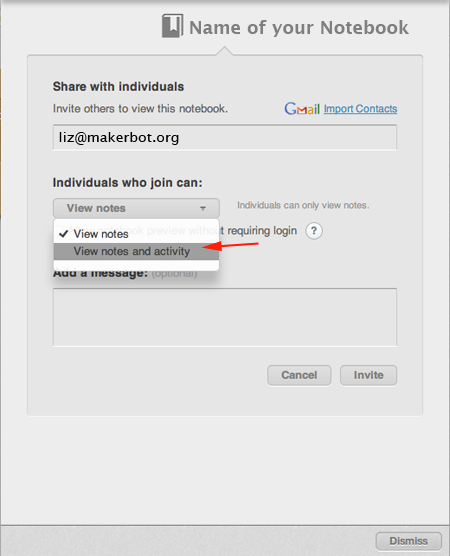
- Share with your instructor's address and allow your instructor to View notes and activity:
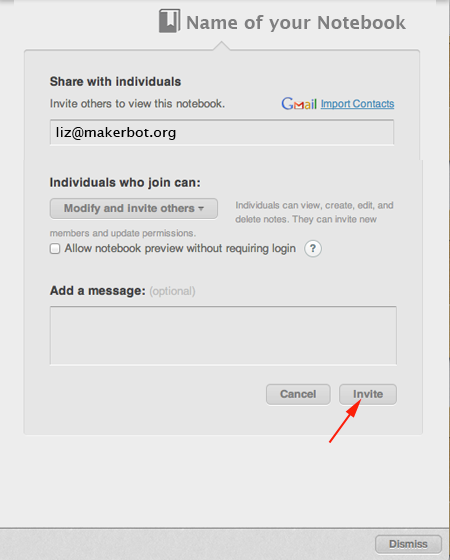
- Click on the Invite button:
Telling a story: create an Instructables
Their Story
The seeds of Instructables germinated at the MIT Media Lab as the future founders of Squid Labs built places to share their projects, connect with others, and make an impact on the world. One of these early places was a blog Zeroprestige, which was an open source hardware experiment for kitesurfing. Here they documented their hand-sewn kites, plywood boards, and other general mayhem that happens when PhDs and high winds collide.
As a result of freely sharing our work, we met a ton of great people, received great opportunities, and were smacked in the face with the need for a web-based documentation system.
Instructables became that documentation system in 2005, as an in-house project of Squid Labs. When they weren't solving interesting problems like solar panels for driveways, efficiently harnessing human power, or strain sensing ropes, you could find them sharing Instructables from the workshop. From cooking to 3d printing, to making just about anything fly, Instructables became the recipient of countless hours of tinkering, soldering, stitching, frying, and fun, making just about anything.
Instructables was officially spun out of Squid Labs in the summer of 2006, and has gone on to grow from a modest hundreds of projects to over one hundred thousand. The community that now calls the site home, is an amazing mix of wonder from around the world. Every day we continue to be amazed by the imagination, curiosity, and simple awesomeness of everyone who shares their creations with us on Instructables.
Assignment
Think of something you have made in the past that you are proud of (a cake, a meal, a digital image, an article of clothing, a toy, a research paper, a poem, etc).
Create a new note in Evernote and outline the steps involved in making your thing.
Navigate to
Instructables and create an
instructable. Your
instructable may be only words, or you could add images and video.
What Makes a Good Animation?
Assignment
Do some research. Find at least three stop motion animations that you like. Copy and paste the links into an Evernote note.
Pick your favorite stop motion animation from the ones you liked. Create a new note and answer these questions:
- What is the link (URL)?
- What do you like best about this animation?
- What kind of story does the animation tell?
- What do you like best about the characters?
- Write about the sound in the animation... how did the sound contribute to this animation?
- How was the video introduced? How did it end? Do you know who created it?
- Were any special effects used? Did they add or detract from the story?
- Do you have any other final thoughts about this animation or things you'd like to remember when making your animation?
Story Starting
Come up with a story. Think about what elements stories have. You can use the
Character Arc Worksheet to help you.
Share your story ideas.
Can you combine ideas to make a better story?
Once you have your groups, complete the
Story Worksheet
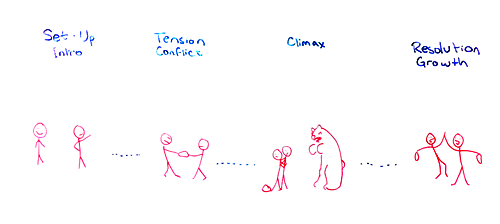 Image by Joseph Weissgold
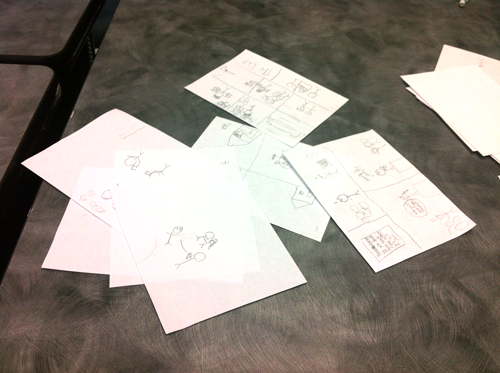 Storyboards from NYU-Poly Botcamp
Characters, props and sets
What can you 3D print? What can you make out of other materials?
Making your models
You can scan people and things in order to create 3D models.
If you are scanning things, try
123D Catch.
Scanning people? Try
ReconstructMe with a Kinect Sensor
Cleaning your scans up
- Use 123D Catch to repair and edit 123D catches
- Use meshlab to reduce triangles, delete extra vertices and close holes.
- Use Netfabb to edit, repair, analyze and cut meshes
- Use Blender to edit and combine meshes
- Use Meshmixer to edit, repair, analyze, cut and smooth meshes
Assignment
- Build your characters, props and sets. Take photos of each and create an Evernote note describing how you created each.
- Find music and sound clips to add and save them in Evernote
Stop Motion Software
There are several applications to help you capture frames, but I like
SingleFramer and
iStopMotion for the Mac.
Capture your frames. Export your movie and edit in a program like iMovie.
Zoetrope
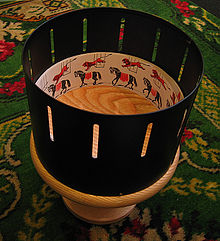
A zoetrope is a device that produces an illusion of action from a rapid succession of static pictures. It's like being at a party with a strobe light—everyone seems to be moving like they are in a stop motion animation.
A zoetrope consists of a cylinder with slits cut vertically in the sides. Beneath the slits, on the inner surface of the cylinder, is a band which has either individual frames or images from a set of sequenced drawings or photographs. As the cylinder spins, the user looks at the images on the opposite side of the cylinder's interior through the slits. The scanning of the slits acts as a strobe and keeps the pictures from simply blurring together—the user sees a rapid succession of images producing the illusion of motion, or a motion picture.
The zoetrope was invented in 1834 by George Horner. He called his invention a "daedalum" or "daedatelum".
The earliest projected moving images were displayed by using a magic lantern zoetrope as early as the 1860's.
Assignment
Navigate to The
customizable zoetrope on

.
Log in or create an account.
Click on the
Open in Customizer button.
Create a wheel and a stand. Download the stl files from Thingiverse.
From the website:
Instructions
Each frame is designed to hold a small piece of paper. You can draw your own, or print out your favorite short animation or animated GIF.
This is a vertical zoetrope that lets you set the size and number of frames in the animation, how far back the frames are pushed to create the shutter slits, and how large of a stand. The wheel and stand are interchangeable, so you can also select which parts you wish to print and easily swap out animations.
A few important notes:
- The outside of the wheel should either be printed with black filament, or painted black later. Having a wheel that's colored or brighter than the inside image can make the animation very hard to see.
- The larger the frames the easier it is to see the animation. As printer platforms continue to increase in size, the larger and longer these animations can become.
- While the parts can be snapped together in some cases, you will always get the best results by gluing together the + connectors in the handlebar.
- There is a 2mm "clip" on the top and bottom of each frame to help keep the paper in place. Given that most printers produce "spillover" this becomes more like 1-1.5mm. Make sure to plan your frame sizes accordingly.
- If the size of the shutter slits are too large the animation becomes blurry. To small and it becomes dim. Right now you will have to experiment to find the best result for your animation.


