Gearbot by Printeraction
What is it?
The Gearbot is another 3D printed toy designed by Olin engineering student Alex Crease. It also has a single actuator (motor). Its transmission is made entirely of gear mechanisms.This bot includes a working clutch mechanism, along with some other basic types of gears.Gears are essentially circular wheels with teeth around their circumference. The teeth mesh with other gears to transmit power. As gears rotate, their teeth contact the teeth on other gears, forcing the other gears to rotate as well. . This lesson is derived from Printeraction's Instructable GearBot A Dual Speed Gear Driven Bot
Parts

PulleyBot-An-Pulley-Driven-Robot
- Pololu Micro Metal Gearmotor 1000:1
- 3 AAA Enclosed Battery Pack with on/off switch
- 3 AAA batteries
- Pololu Universal Hub for 3 mm shaft with 4-40 Holes
- Pololu Micro Metal Gearmotor Bracket
- Pololu Micro Metal Gearmotor 298:1 or 1000:1
- 2 4-40 Socket Head Cap Screws
- Pack of 2 inch ID, 1/8th thick O-Rings
- 1 foot of .25 diameter D profile rod stock
- 2 2.225 inches
- 2 2.388 inches
- Small screwdriver
- Wire strippers
- .05" Hex Wrench (comes with motor hub)
- 3/32 Hex wrench
- Solder and soldering iron
- Superglue
- File
- 3D Printer
- Grease

GearBot-A-Dual-Speed-Gear-Driven-Bot
Gather your 3D printed parts:
- 1 Back_Chassis: Large piece with a slot for the battery box and two holes for shafts.
- 1 Front_Chassis : Smaller piece with two holes on the front face, and two holes passing through each side.
- 1 Clutch : Small piece with three teeth sticking into the profile of a hole.
- 1 Spacer : Cylindrical piece.
- 2 Hubcap : Small, circular pieces with a D-shaft profile
- 2 Bevel_Gear : Bevel gear pieces.
- 1 Low_Speed_Driver : Small gear with a flat face on one side.
- 1 Low_Speed_Clutch: Large gear with teeth extruding from its face.
- 1 High_Speed_Clutch : Small gear with teeth extruding from its face.
- 1 High_Speed_Driver : Large gear with a flat face on one side.
- 1 Driven_Gear: Large gear with a hub extruding from it.
- 1 Drive_Gear : Large gear with four holes in it.
- 1 Foot_Left : Wheel with feet on it pointing counter-clockwise looking at it from the hub side.
- 1 Foot_Right : Wheel with feet on it pointing clockwise looking at it from the hub side.
- 2 Wheel : Wheels with a textured rim and hubs extending from their faces.
Instructions
This lesson is derived from Printeraction's Instructable GearBot-A-Dual-Speed-Gear-Driven-Bot- Gather and organize your parts.
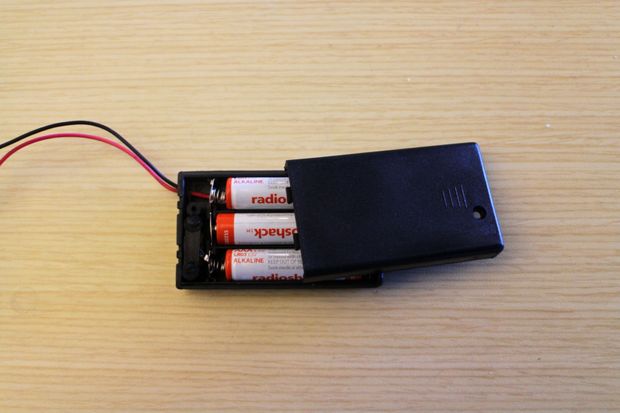
- Place the batteries inside the battery holder. Unscrew the screw from the back of the battery box and slide the cover off. Put three AAA batteries into the case and re-attach the cover.
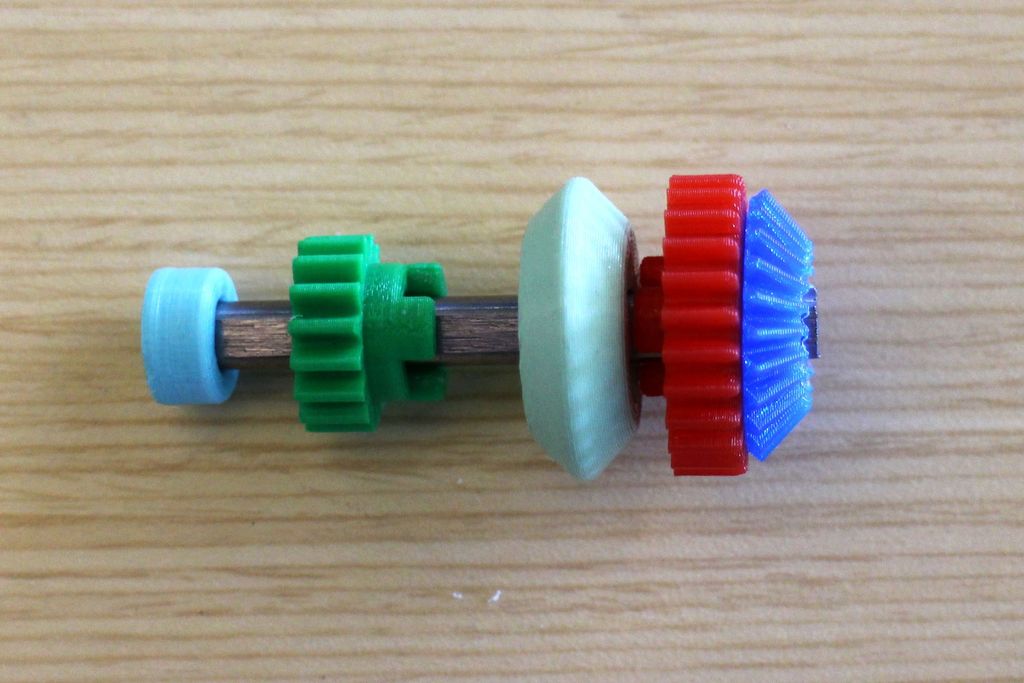
GearBot-A-Dual-Speed-Gear-Driven-Bot - The 3D printed pulleys have a tight fit around the shaft and the frame has a loose fit.
Note: the clutch piece should slide along the D shaft, but NOT rotate. The two clutch gears should rotate freely around the shaft. The clutch piece has a pretty tight fit initially, but once you press it onto the shaft and slide it back and forth a bit it will loosen up. Make sure the flat tooth on the clutch lines up with the flat side of the D-shaft.
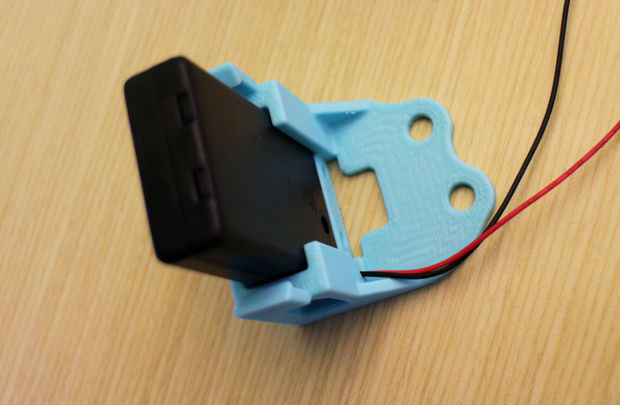
GearBot-A-Dual-Speed-Gear-Driven-Bot - Slide the battery box into the back of the Back_Chassis piece. Slide it in with the power switch facing down and toward the back of the chassis. You'll notice on the bottom of the that there is a nice slot to give the switch clearance. You'll also need to keep track of where the wires end up. As you slide the box in, make sure the wires are sticking out of the notch at the back of the Back_Chassis piece. This will prevent them from getting squished or tangled in the chassis.
GearBot-A-Dual-Speed-Gear-Driven-Bot -
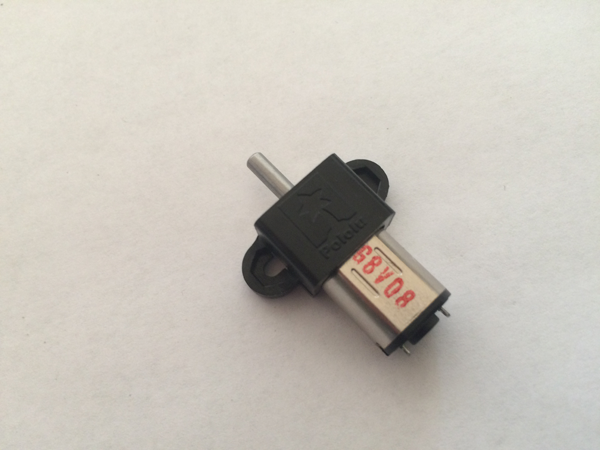
Place the motor bracket on top of the motor's gearbox (with the top of the Pololu logo toward the motor shaft).
- Place the two nuts into their cavities on the bracket
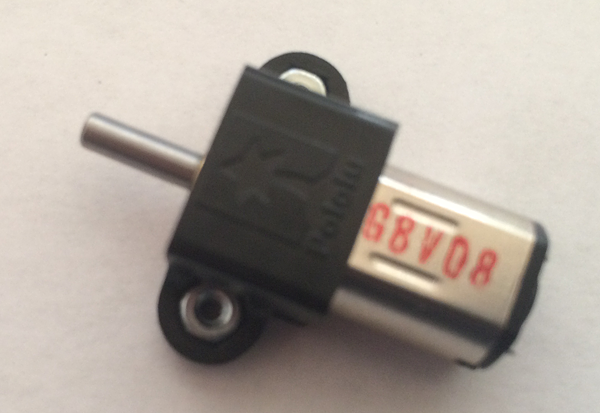
- Slide the bracket and motor into the bracket-shaped hole on the back of the chassis. The motor and bracket should be flush with the back face.
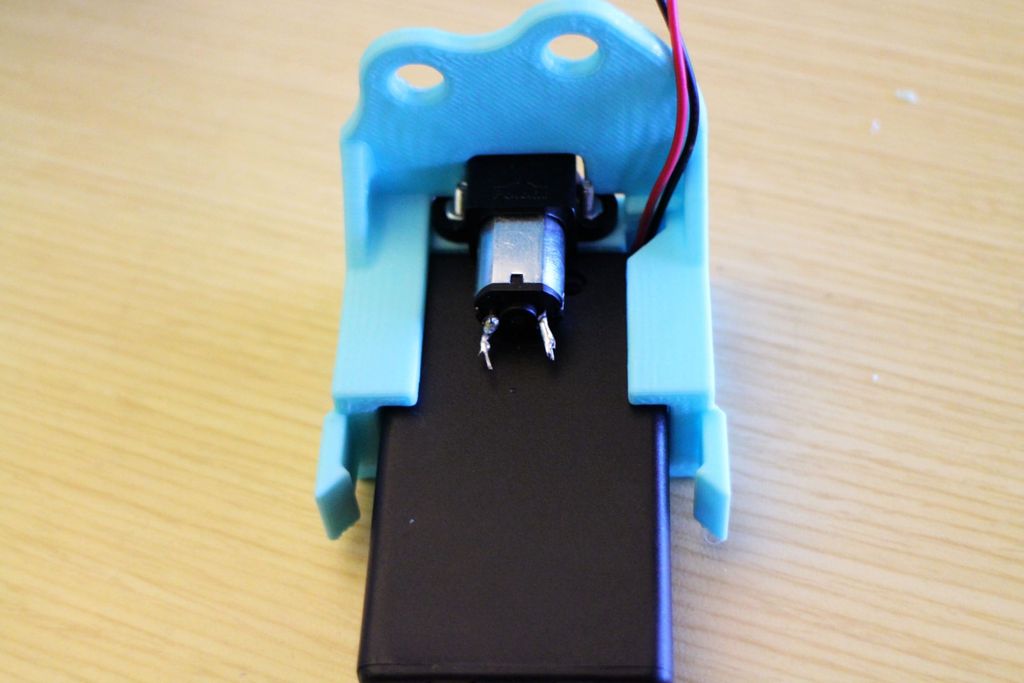
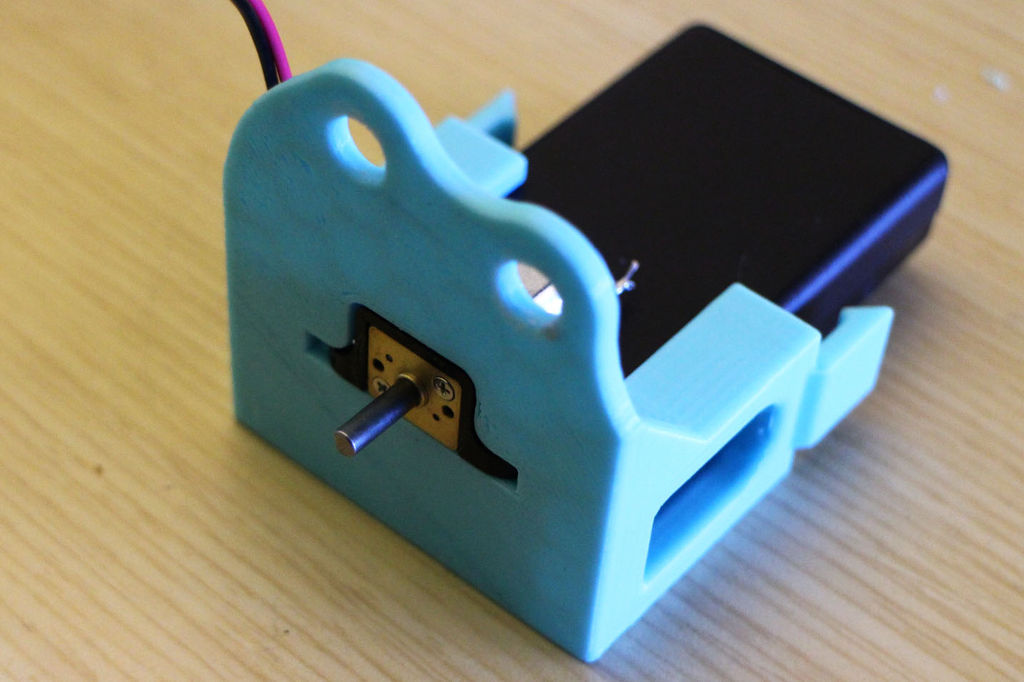
GearBot-A-Dual-Speed-Gear-Driven-Bot - Stick the two bolts up through the holes in the bottom of the chassis and use the screwdriver to screw them into the nuts and tighten everything down.
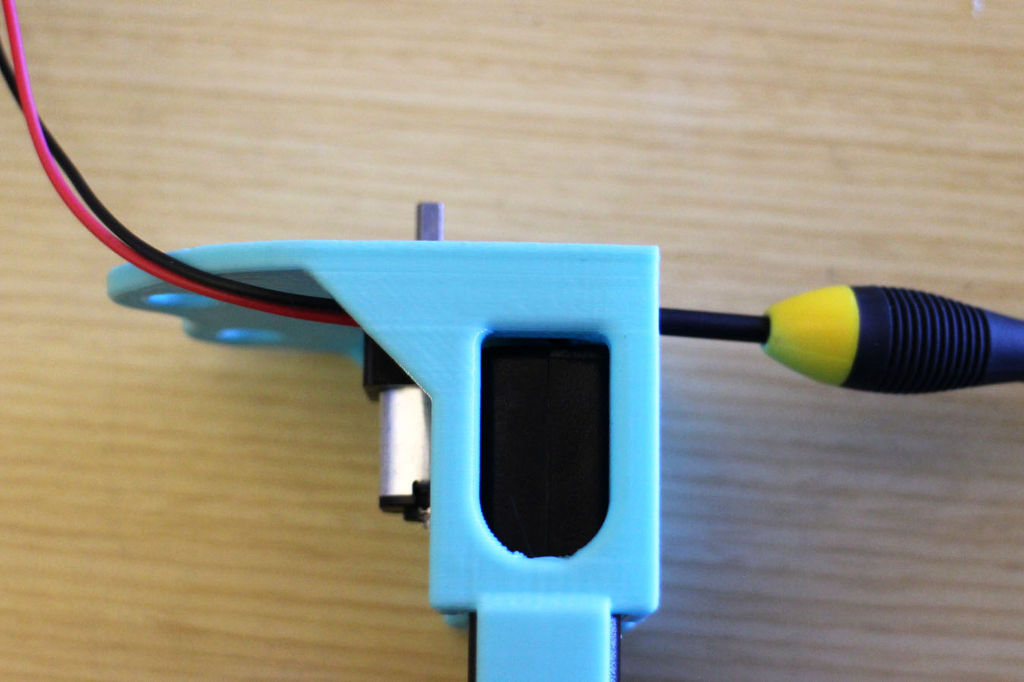
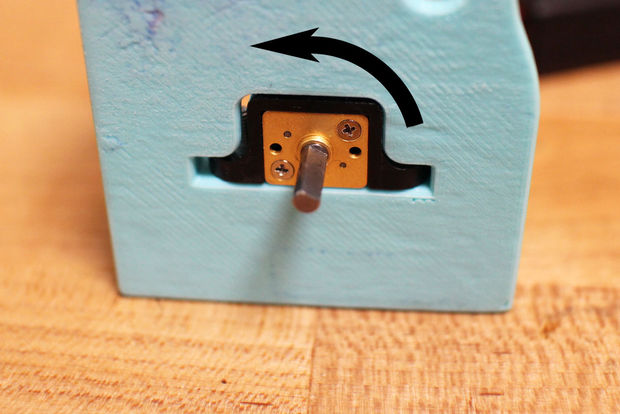
GearBot-A-Dual-Speed-Gear-Driven-Bot - Make sure that the motor will spin in the right direction before soldering the motor to the battery box. Cut the wires down to minimize the slack, and strip their ends. Looking at the back of the chassis, the motor needs to be spinning counter-clockwise for the robot to drive forward. Turn on the switch on the battery box, and hold its wires against the leads of the motor. Make sure that the motor spins counter-clockwise. If it is spinning clockwise, switch the wires.
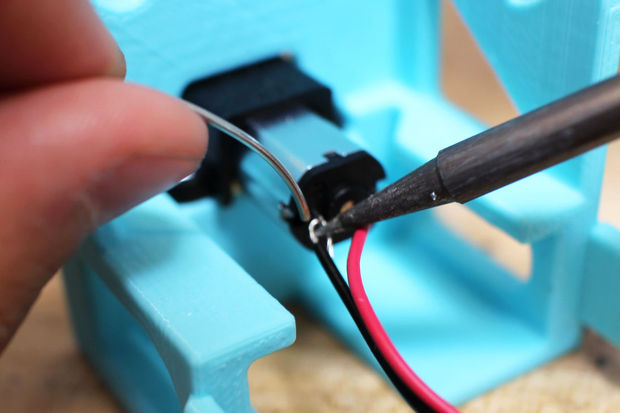
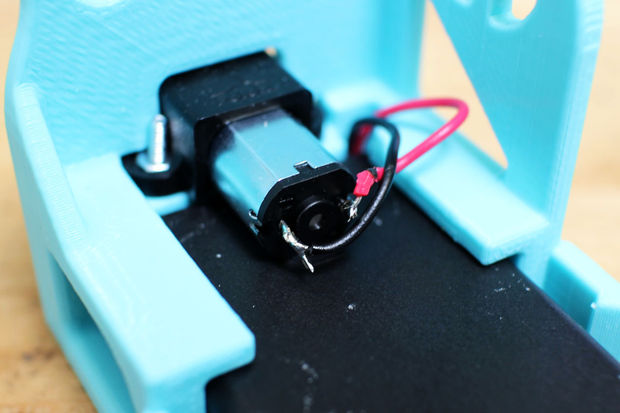
GearBot-A-Dual-Speed-Gear-Driven-Bot - Feed the stripped wires through the holes in the motor leads. Secure the wires by looping the ends through the lead and twisting the wire around itself. Then solder the wire to the leads.
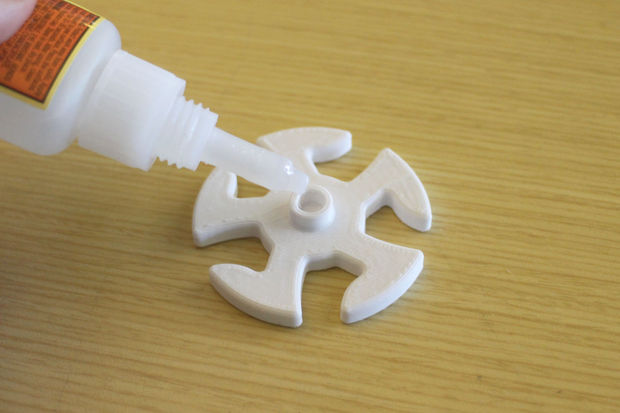
GearBot-A-Dual-Speed-Gear-Driven-Bot - Superglue the following pulleys and shafts together to ensure a secure connection:
- Driven_Gear to 2.225" shaft
- Hubcap to 2.225" shaft
- Foot_Right to 2.388" shaft
- Wheel to 2.388" shaft
Note: Don't apply too much glue. If you do, it will flow up and onto the shaft above the wheel, and this will make the fit between the shaft and the axle holes tighter and harder to turn, which is not a good thing! Just add a small dab of glue to the bottom of the hole in the gears and wheels.
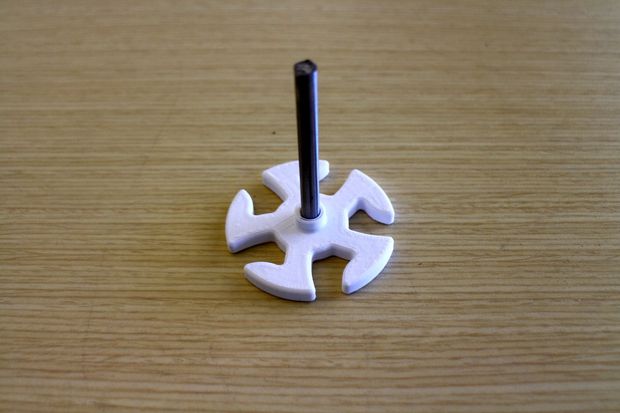
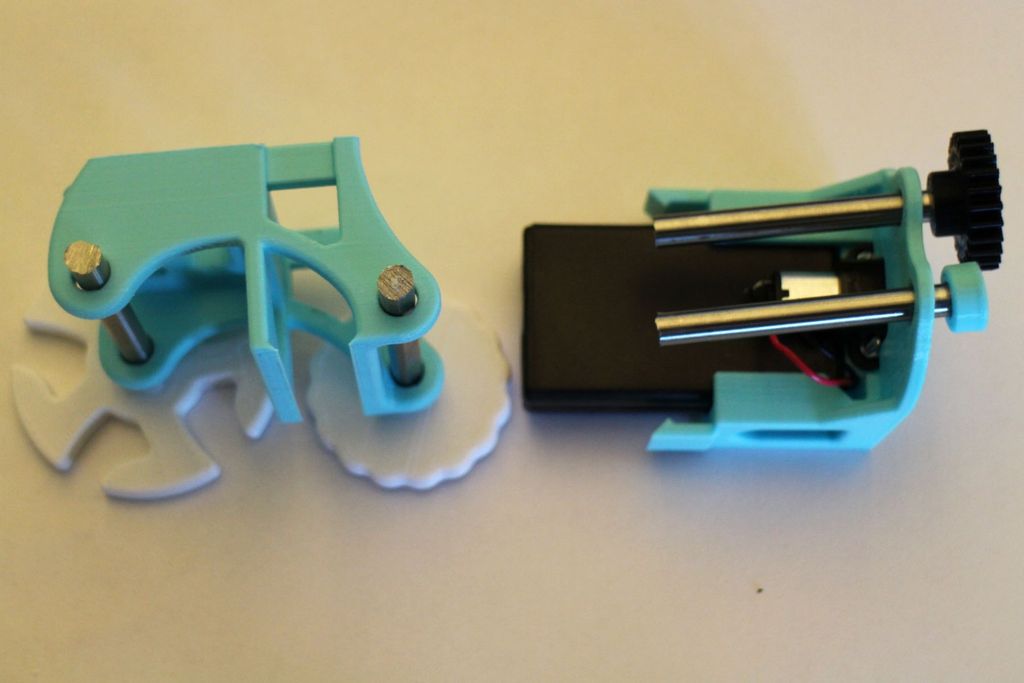
GearBot-A-Dual-Speed-Gear-Driven-Bot - Before you put anything together, add some grease to the axles. The Driven_Gear axle will go through the holes on the right side of the Back_Chassis piece (looking from the back), while the Hubcap axle will go through the right. The Foot_Left shaft slides through the top of the Front_Chassis piece, while the Wheel piece slides in below the battery box enclosure. Greased joints will ensure a smooth rotation once everything is assembled, and prevent anything from catching.
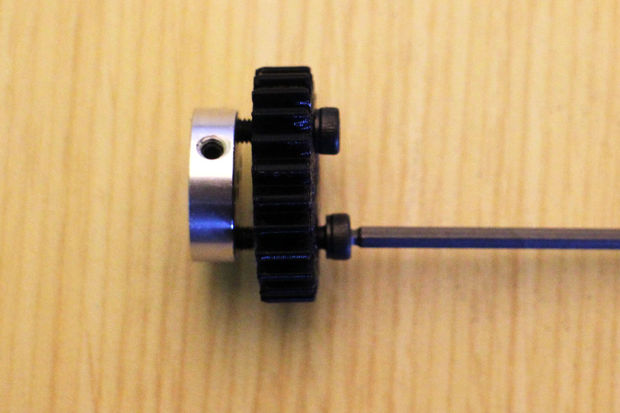
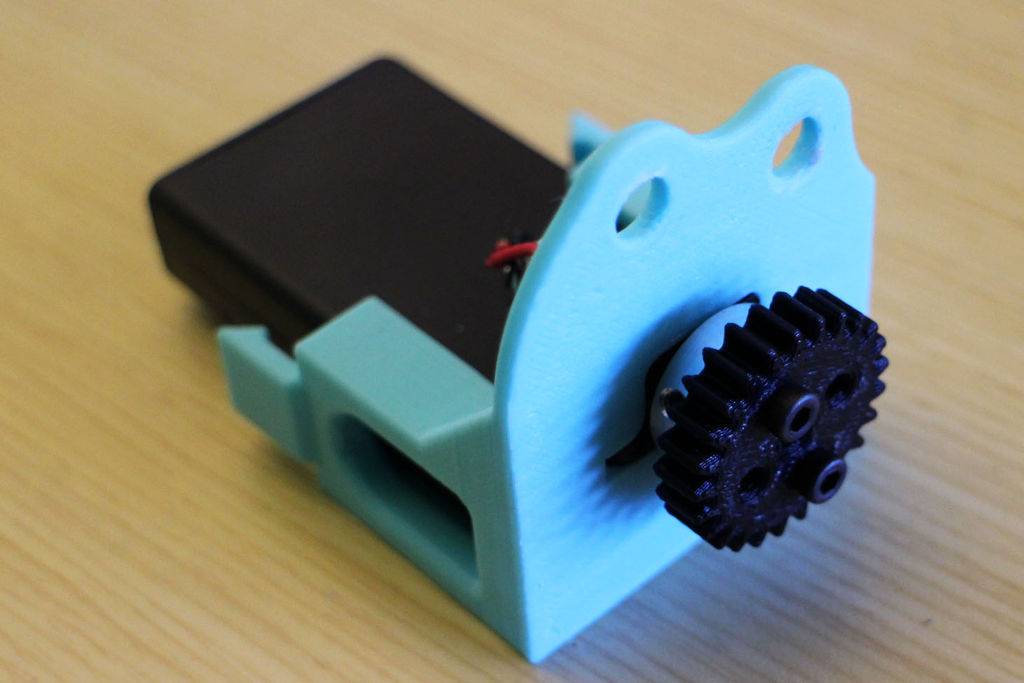
GearBot-A-Dual-Speed-Gear-Driven-Bot - Put your first gear on the bot. Stick the two 4-40 screws through opposite holes on the Drive_Gear piece and screw them into the motor hub with the 3/32 hex driver.
GearBot-A-Dual-Speed-Gear-Driven-Bot -
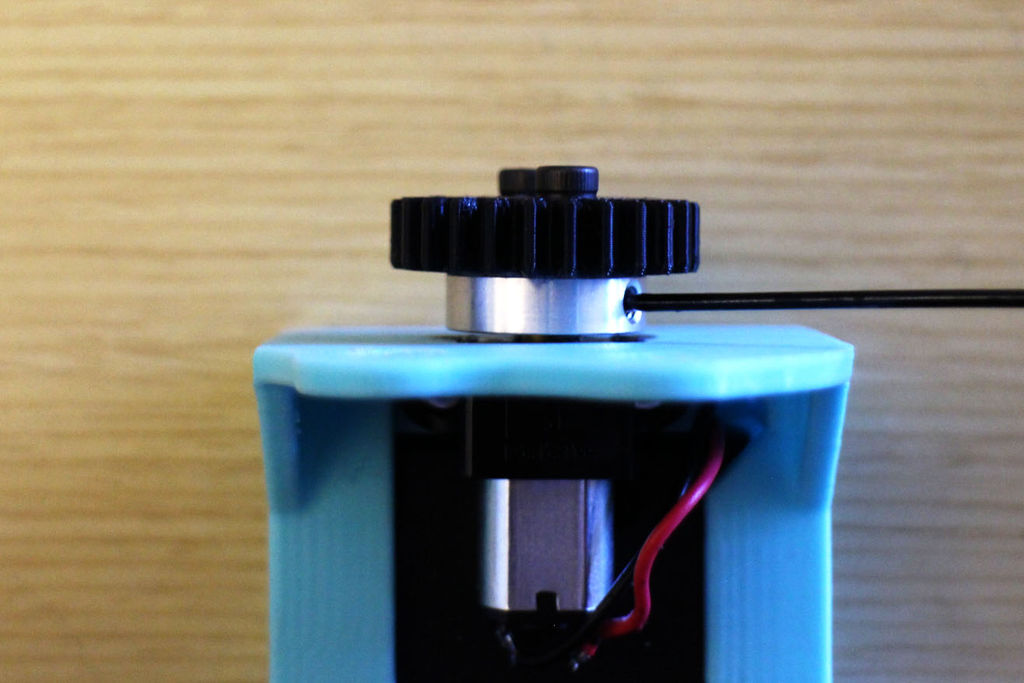
Thread the set screw into the motor hub with the .05" hex wrench, then feed the hub onto the motor shaft, making sure to line the set screw up with the flat side of the shaft. Tighten it down.
GearBot-A-Dual-Speed-Gear-Driven-Bot - Slide the Driven_Gear shaft through the top right hole of the Back_Chassis. After its all the way through, slide the High_Speed_Driver gear on, with the flat, round face away from the chassis wall.Next slide the Spacer piece on, and then the Low_Speed_Driver, with its flat face facing the chassis this time. These two gears will drive the gears on the clutch mechanism.
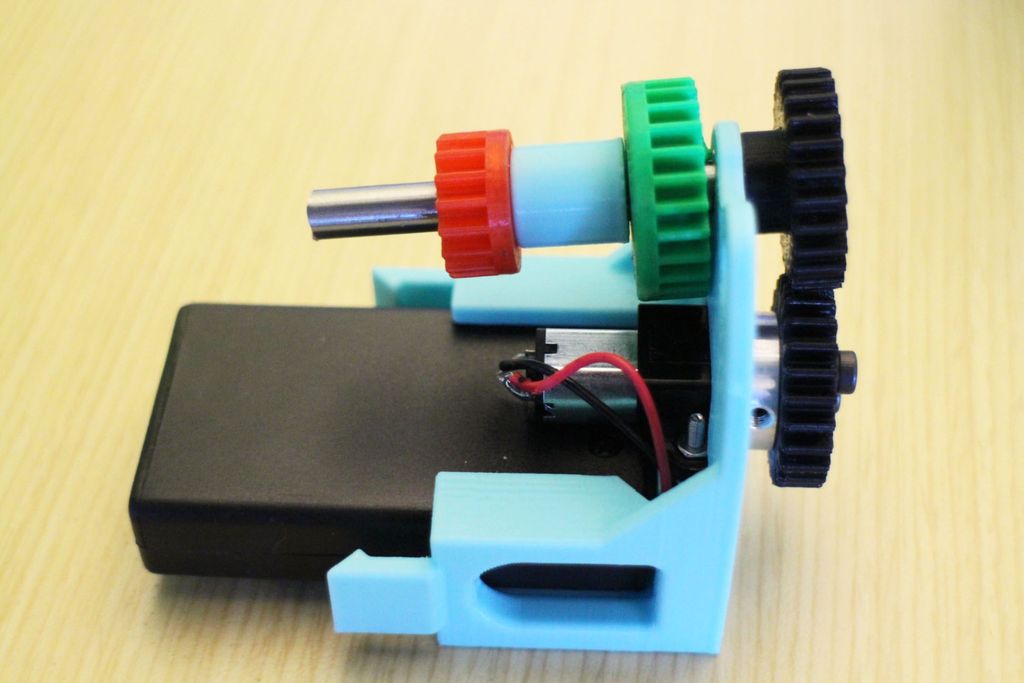
GearBot-A-Dual-Speed-Gear-Driven-Bot - Add the clutch shaft. Slide the shaft with the Hubcap piece on the end through the other hole (top left, looking from the back), in the Back_Chassis piece. After it's through, slide the High_Speed_Clutch piece onto the shaft, with the teeth facing away from the Back_Chassis. The gear should rotate freely around the shaft. Next, slide the Clutch piece onto the shaft.
Note: Make sure you're putting the clutch on the right way. The tooth with the flat internal face should line up with the flat on the D-profile shaft.
After the Clutch piece is on the shaft, slide the the Low_Speed_Clutch gear onto the shaft, with its teeth facing the shaft. Like the other clutch gear, the gear should rotate freely.
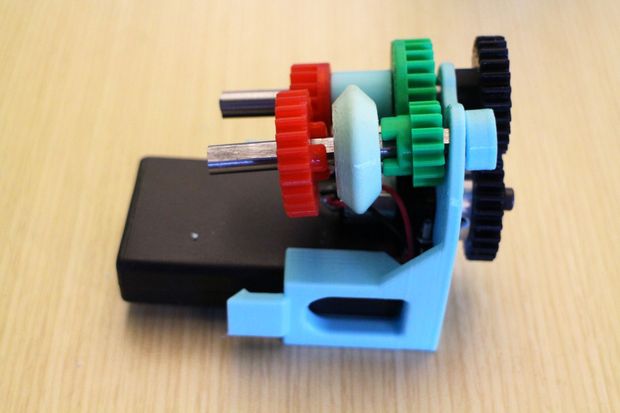
GearBot-A-Dual-Speed-Gear-Driven-Bot - Snap the Front_Chassis piece onto the battery box, with its large, flat face against the Back_Chassis. Make sure thet the two axles slide through their respective holes in the Front_Chassis. There are snap-fit joints on either side of the Back_Chassis that snap into the insets in the Front_Chassis piece. You may need to spread them a little with your fingers as you slide the part on. Once each hook clicks into each hole, the entire chassis should be secure.
Note that the movement of the battery is stopped by small chamfers at the front of the piece. Ensure both gear sets are meshing before clicking the Front_Chassis in place.
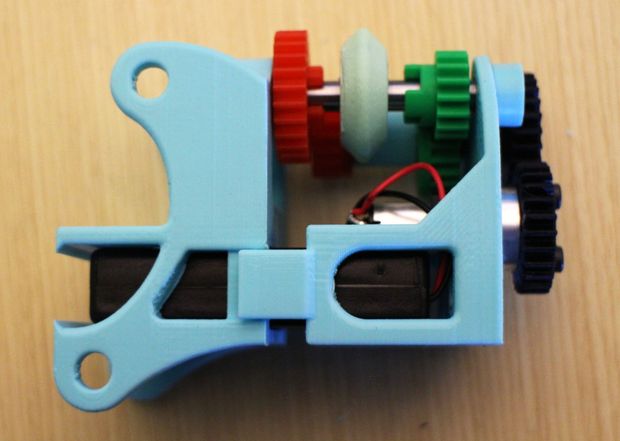
GearBot-A-Dual-Speed-Gear-Driven-Bot - Put some superglue in the inset of the second Hubcap piece and fit it onto the drive shaft (the one without the clutch). For the clutch shaft, slide a Bevel_Gear part onto the end, with some superglue around the hole for the shaft. Make sure the teeth are facing out, and the back face of the gear is flush with the chassis wall.
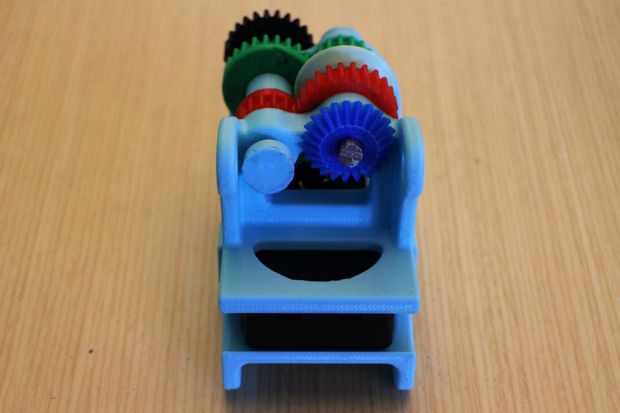
GearBot-A-Dual-Speed-Gear-Driven-Bot - Slide the Foot_Right shaft assembly through the right side of the chassis, like in the image above. As you do so, slip the other bevel gear onto the shaft so that its back face is flush with the right wall of the Front_Chassis piece.
Slide the Wheel shaft assembly through the lower set of holes in the chassis as well.
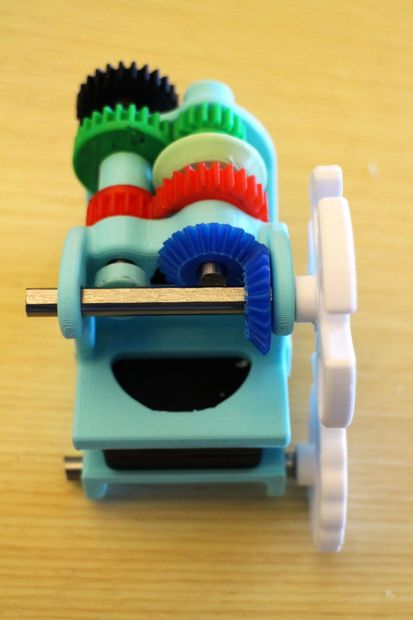
GearBot-A-Dual-Speed-Gear-Driven-Bot - Put a dab of superglue inside the hubs of the remaining Foot_Left and Wheel piece, and slide them onto their respective shafts.
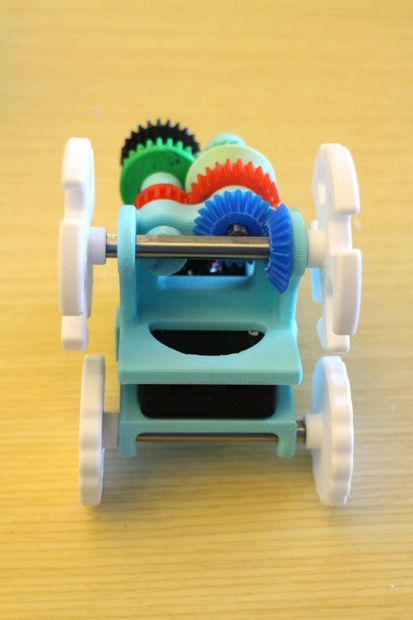
GearBot-A-Dual-Speed-Gear-Driven-Bot - When aligned correctly, the clutch piece can slide around the teeth of the clutch gears. Slide the clutch along the shaft so that it engages with the small gear. If you turn the motor on, this will drive the shaft at a 2:3 ratio with respect to the motor (because the ratio from the motor to the first shaft is 1:1), so this is high speed. When you slide the clutch over to the other (turn the motor off before you do this for the first time), larger gear, this drives the shaft at a 3:2 ratio, so it is a lower speed. It ends up that high speed is twice as fast as low speed. You can shift the clutch while the motor is running, but it can sometimes get stuck and stall the motor, so be careful when you do so!
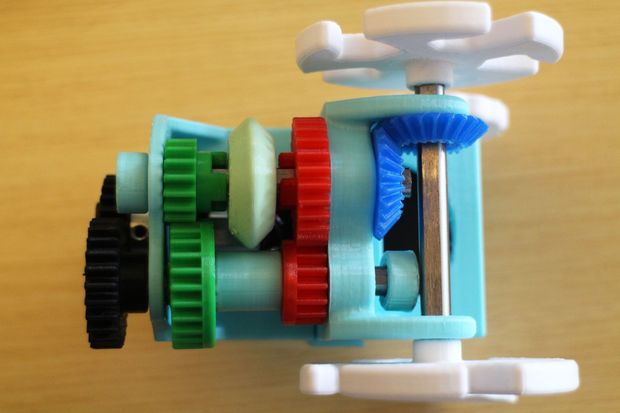
GearBot-A-Dual-Speed-Gear-Driven-Bot - Test the gearbot. Turn it on and see if it moves! If it doesn't move, you may want to check to ensure the gears are meshing and nothing is getting stuck. If they do get stuck, grease the axles around their pivots in the chassis.
- Decorate.
