Tutorial
Extruding svg files with Blender
What is it?
Blender provides a very simple way to extrude SVG files. This is great for whenever you want to convert 2D to 3D.This tutorial will also explore tessellations. A tessellation is a repeating pattern with no gaps or overlaps. This tutorial will show you how to design a tile in Inkscape and then import it into Blender.
What's the tutorial?
Extruding
- If you don't have Inkscape, download and install it from here. Otherwise open the application.
- Create a New Document. CTRL+N
- Press F4, hold down CTRL and drag a perfect square.
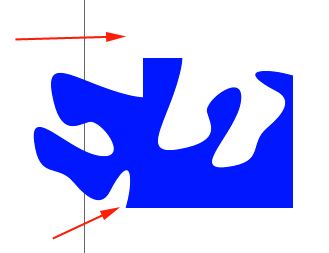
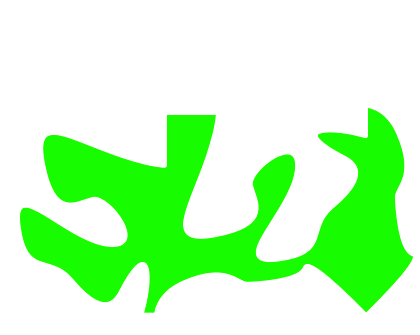
- Take a nibble from the top with the beziér tool. Make sure to come out at one of the corners:
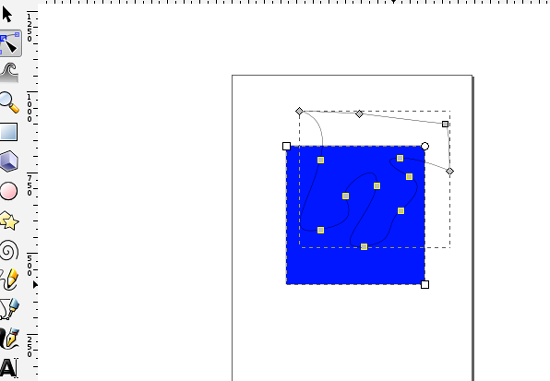
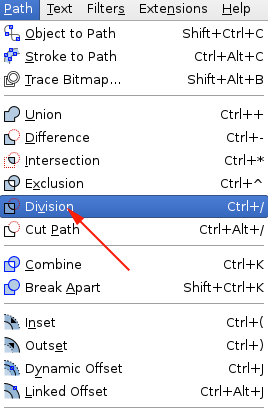
- Select nibble and square and select Path>Division
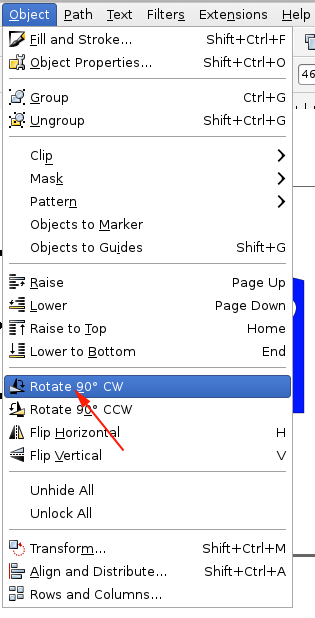
- With the Select and Transform Object tool, just select the nibble. Move to the left. Select Object>Rotate 90° CW
- Fit the shape against the left edge.
-
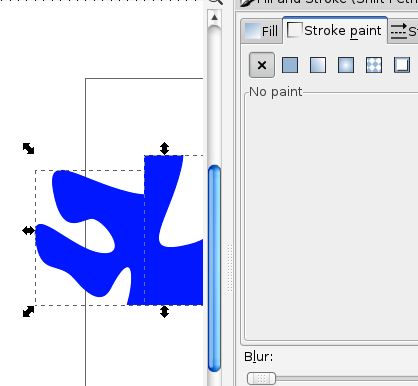
Make sure there is no stroke.
-
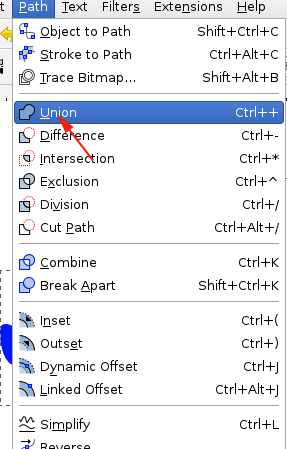
Select the nibble and the square and then select Path>Union
- With the Beziér tool, create a nibble from the bottom. Make sure you come out at a corner
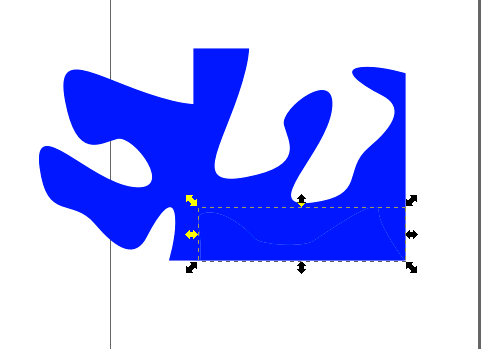
- Select nibble and square and select Path>Division
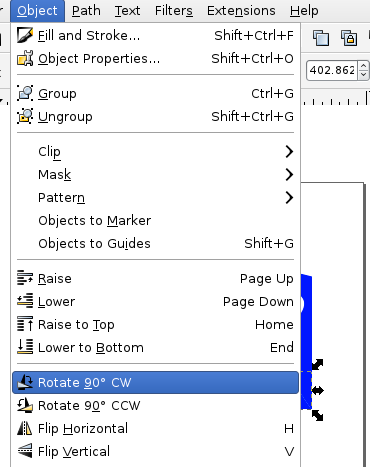
- With the Select and Transform Object tool, just select the nibble. Move the nibble to the right
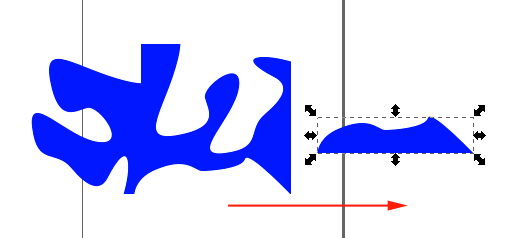
- Select Object>Rotate 90° CW
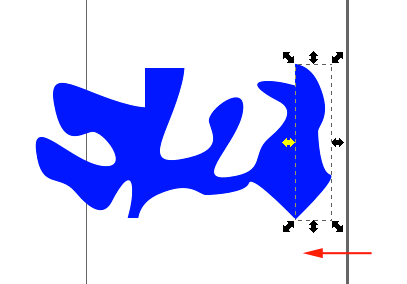
- Fit the shape against the right edge. Make sure there is no stroke.
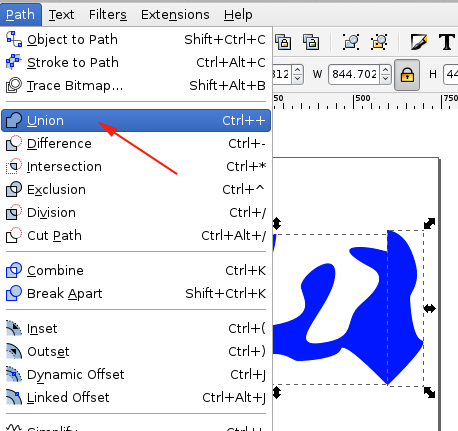
- Select the nibble and the square and then select Path>Union
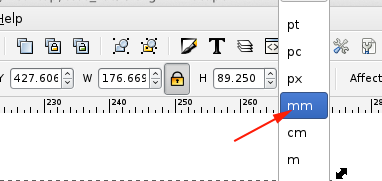
- Change the measurement to millimeters
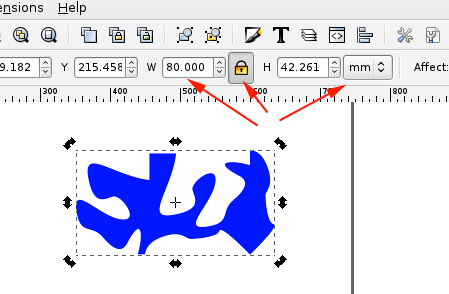
- Resize the tile to have a width of about 80mm. Lock the width.
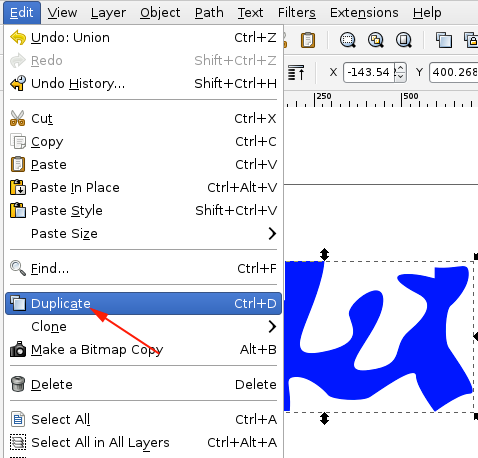
- Create a duplicate of the tile by pressing Edit>Duplicate
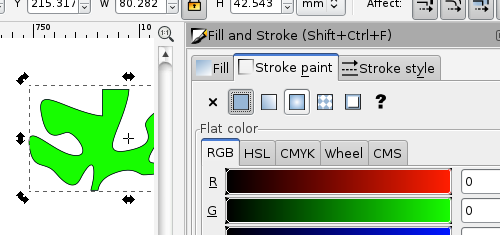
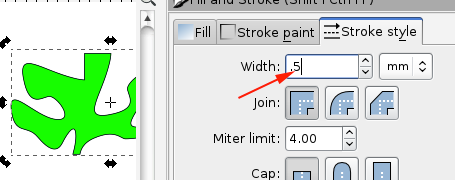
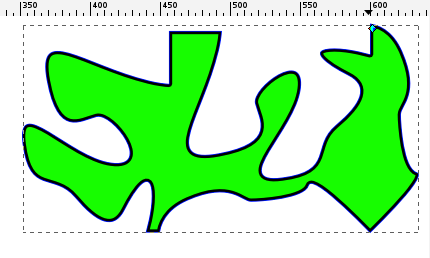
- Change the fill color of the duplicate. And set the stroke of the duplicate to .50mm and change the fill color
- Press CTRL+J for dynamic offset and move the duplicated tile in the same amount as the stroke
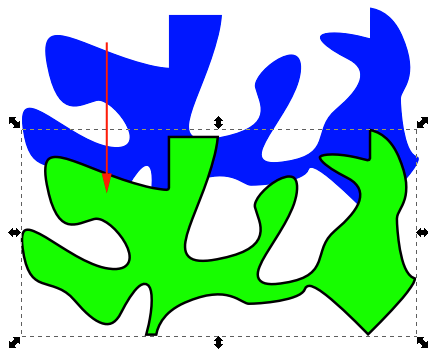
- Move the duplicated form down
- Turn off the stroke
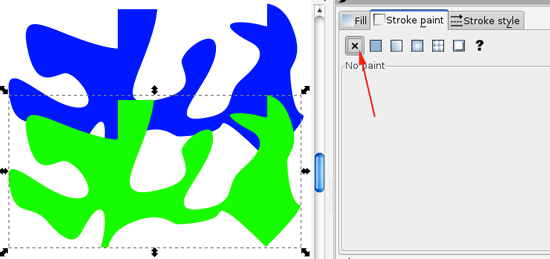
- Delete the original tile.
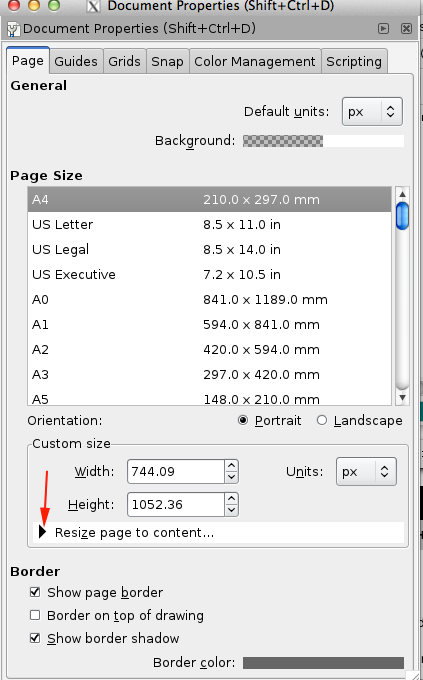
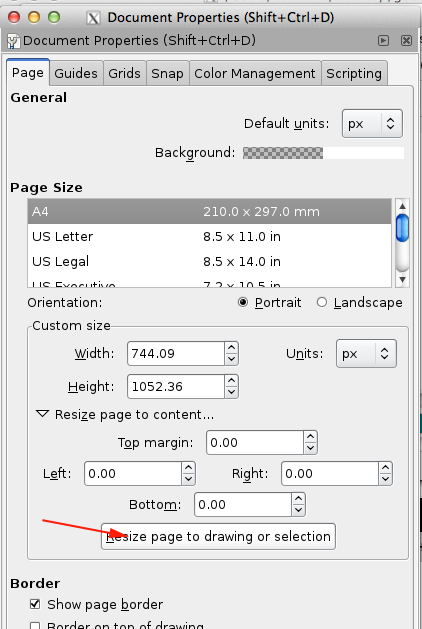
- You want to resize the document to your image. Press File>Document Properties, toggle open Resize page to content and click Resize page to drawing or selection
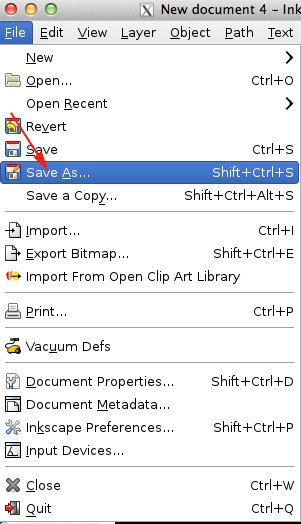
- Save your tile as an SVG file
- If you don't have Blender installed, download it from blender.org and install it.
- Open Blender
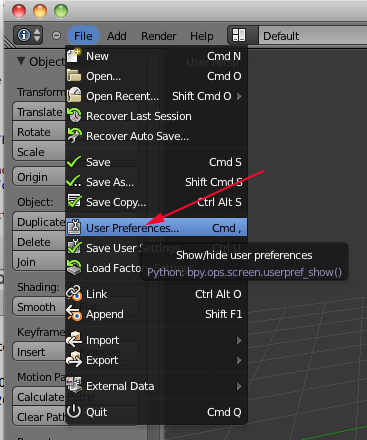
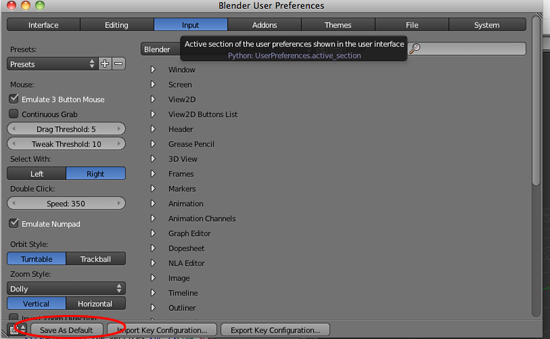
- If you have never used Blender before navigate to File>User Preferences or type (CMD+,).
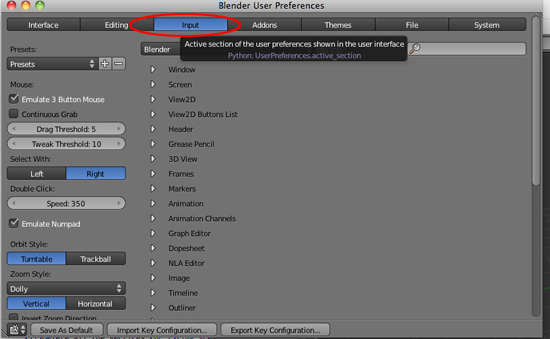
- Click on Input
- Click on Emulate Button Mouse and Emulate Numpad
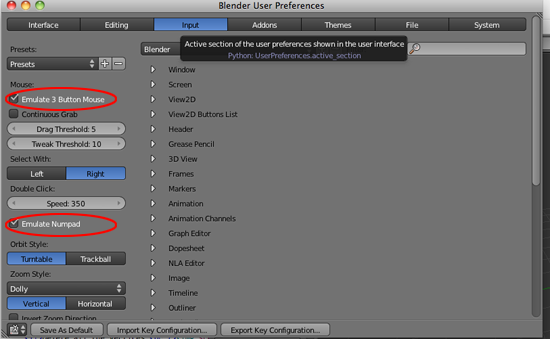
- Click on Save As Default
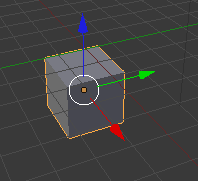
- If the cube is not selected (if there is not an orange line around it), RIGHT click on it to select it:
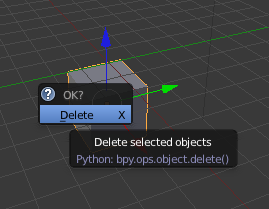
- Press X and click on Delete to delete the cube.
- Click on File>Import>Scalable Vector Graphic (.svg) and navigate to your .svg file and click on Import .SVG button in the top right corner.
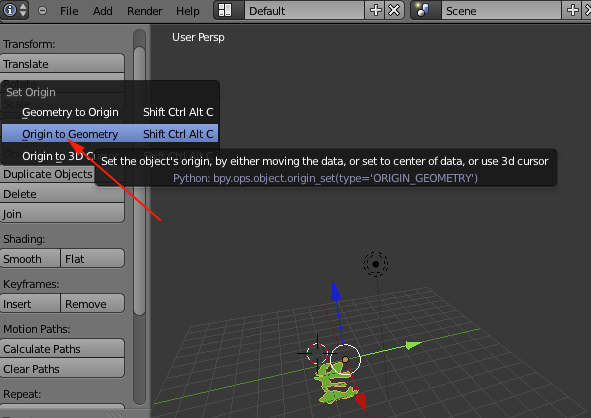
- RIGHT+click on the imported file so that it is selected.
- In the left panel select Origin to Geometry
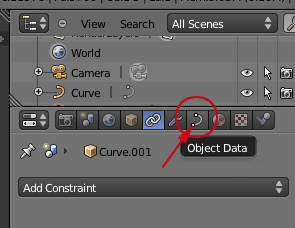
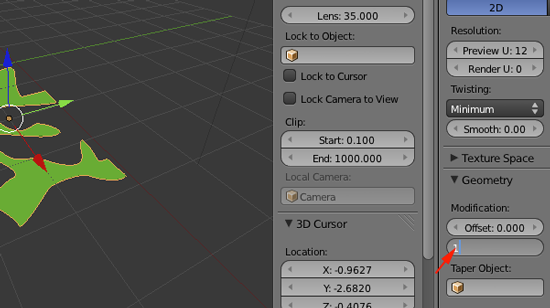
- Click on Object Data in the Right Panel:
- This will open the Object Data panel:
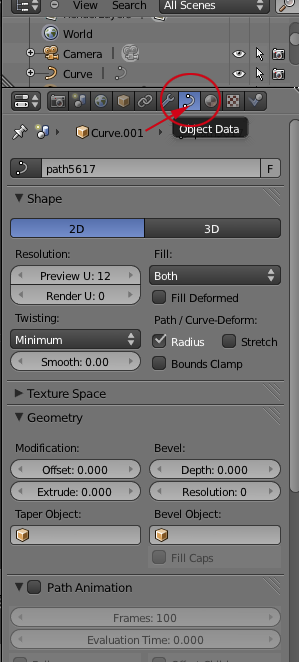
- If it isn't open, toggle open the Geometry panel
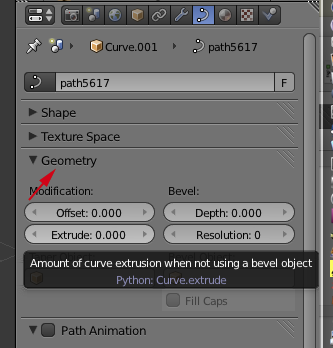
- CTRL+click on Extrude
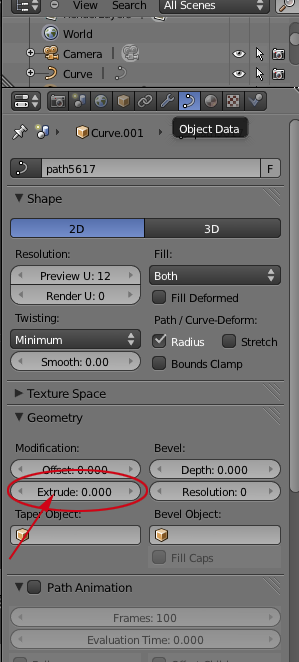
- Change the extrude value to 1
- In the Viewport press N. And resize your shape by pressing S and scaling up so that your width matches your your width from the original .svg file:
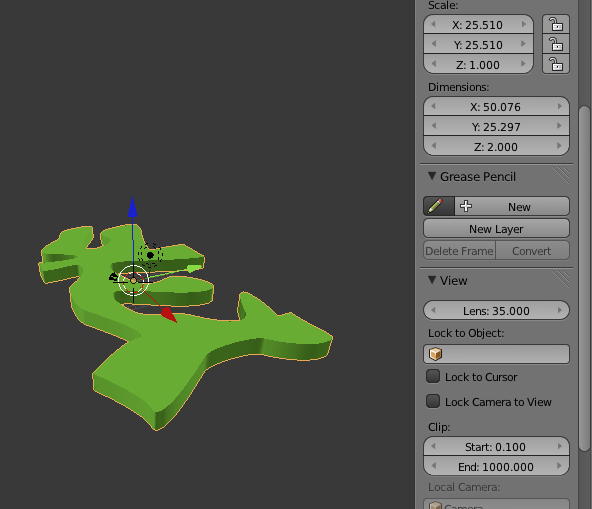
- Set the z to however high you want your tile.
- Convert the shape to a mesh by selecting Object>Convert To>Mesh from Curve

- Select the object if it is not selected and select File>Export>STL(.stl) Save the stl and open in MakerWare or ReplicatorG. Print at least two pieces.
Now what?
- Upload your tessellation to Thingiverse
- Come back tomorrow for more information and inspiration!
