Introduction
"The art of teaching is the art of assisting discovery"-Mark Van DorenBe patient with yourself when learning something new.
Education by design is a one-week intensive workshop for educators in lesson design and emerging technologies. The workshop bridges your experience in the classroom with new tech tools and design strategies. You will be encouraged to find ways to utilize technology to your advantage.
In the workshop you will design a fully actionable lesson through a design process. Through visualizing, storytelling, and making iteratively you will design a lesson that excites your students and satisfies your needs.
Our objectives are to
- Make students responsible for their own learning outcomes.
- Foster important questions in the minds of learners.
- Build cooperative learning opportunities.
- Encourage personal exploration in the pursuit of common learning objectives.
- Focus on rapid prototyping and testing.
- Emphasize continuous documentation and sharing.
Introduction to 3D
This project provides an introduction to modeling and printing:3D Software
- 123D Design is free software from Autodesk that allows you to use Sketches, lofting, extruding and revolving.
See tutorials - SketchUp—friendly and forgiving 3D modeling software
- OpenSCAD—The Programmers Solid 3D CAD Modeller
- MeshMixer
- NetFabb
- Kinematics@home
- Shapeshifter
- iPad software
- Modio
- 123D Catch
- 123D Sculpture
- 123D Creature
- 123D Design
- Autodesk Products
- Fusion 360—
- Autocad—CAD design, drafting, modeling, drawing, and engineering software.
- Maya—Innovative tools for 3D modeling, animation, effects, and rendering.
3D Printer maintainence
- Make sure belts are not loose
- Keep metal parts lubricated.
- To lubricate the extruder, dip filament in vegetable oild (canola) before loading
- Check belts to make sure they are not too loose
Ideas
- Modify this bridges assignment from BEAM, U.C Berkeley's Science and Engineering Outreach Program
- Adornment challenge: design pendants, bracelets or superhero rings.
- Puzzle Challenge: design a puzzle comprised of 3 interlocking separate objects
- Mr. Potato Challenge: Design a base and modular pieces to attach to the base
- Ball and Socket: Create an articulated hand or foot
- Animation Challenges: Design/Plan a possible stop motion animation that could use printed pieces
- Animation Challenge: Create a face with pieces for the mouth, eyes and eyebrows that can be moved and synced to sound
- Engineering Challenge: Create pieces for Rube Goldberg Contraption
- Design Challenge: Lamp That— turn an object into a lamp.
- Design Challenge: One a Day—ideating, designing, modeling and making. Pick an object like a coffee cup and see how far you can push it
- Design Challenge: Create a 3D model from a younger student's drawing
- Design Challenge: Scan and modify a plush toy
- Engineering Challenge: Recreate a model from the Reuleaux Collection of Mechanical Mechanisms at Cornell University
- Engineering Challenge: Design a machine that implements at least one of the following:
- inclined plane
- lever and fulcrum
- wedge
- screw
- wheel and axle
- Pulley
- Engineering Challenge: Design a robot that can move forward using kinematics
- Engineering Challenge: Design an automaton
- Engineering Challenge: Design the tallest structure with moodular parts
- Science and Engineering Challenge: Egg Drop Holder
Design an Egg Drop Container Using Autodesk 123D - Math: Explore fractals with Sierpinski Tetrahedron and the Menger Sponge
Mathematical Art at Shapeways - Math: Explore hyperbolic paraboloids in a multivariable calculus class
f[u_,v_]:={u,v,u^2-v^2}; scale = 40; radius = 0.75; numPoints = 24; gridSteps = 10; curvesU = Table[ scale*f [u, i ] , {i , -1, 1, 2/gridSteps }]; curvesV = Table[scale*f[j, v], {j, -1, 1, 2/gridSteps}]; tubesU = ParametricPlot3D [ curvesU , {u , -1, 1} , PlotStyle -> radius , PlotPoints -> numPoints ] , PlotRange -> All ] ; tubesV = ParametricPlot3D [ curvesV , {v , -1, 1} , PlotStyle -> radius , PlotPoints -> numPoints ] , PlotRange -> All ] ; Tube [ Tube [ shape of the object than a blank, featureless surface does, and it also communicates mathematical content in terms of the parameterisation. Third, it can be useful to be able to see partially through the surface to other features behind it. 3.3 Mathematica code Here is the code to generate the graphical output shown in Figure 7a, together with the STL file. corners = Graphics3D[Table[Sphere[scale f[i, j], radius], {i, -1, 1, 2}, {j , -1, 1, 2}] , PlotPoints -> numPoints ]; output = Show[tubesU, tubesV, corners] Export["MathematicaParametricSurface. stl", output] - Science: Explore the story of how a child's skull, found in an ancient cave, helped answer one of our oldest questions: Where do we come from? Radio Lab's The Skull
Print the Taung Child Skull - Humanities: Create puppets and re-enact a reading or play.
- CyArk: Spurred by the Taliban's destruction of the 1600-year-old Bamiyan Buddhas in Afghanistan, CyArk was founded in 2003 to ensure heritage sites are available to future generations, while making them uniquely accessible today. Visit the website for 3D lesson plans
- Interdisciplinary: Capture your town, neighborhood, school
- Interdisciplinary: Urban Futures
- Science: Create your own species. Design a fossil or skeleton and determine its scientific classification.
- Science: print out bones, jaws,etc. and have students determine scientic classification
Sensor Intro
| accelerometer | changes in speed | 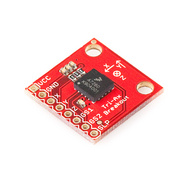 Triple Axis Accelerometer Breakout - MMA7260Q Description: This is a breakout board for Freescale's triple-axis MMA7260QT accelerometer. With a low power shut-down mode, high sensitivity output with selectable ranges (±1.5, 2, 4, and 6g), this was one of the very first sensors to market with three accelerometers built onto a single IC! Board comes fully assembled and tested with external filters installed. The MMA7260QT is a 3.3V part and outputs an analog voltage for each of the three outputs. This voltage is in ratio to the measured acceleration and to the supply voltage (ratiometric). You will need some extra hardware to convert this analog signal to a usable digital one. Luckily, many uCs have a built in Analog to Digital converter. |
| capacitance | electrical properties often associated with human touch | 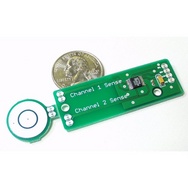 Description: Breakout board for the Analog Devices 7746 capacitance sensor. Configured for two channels of single-ended capacitance input. Comes with an example touch sensor as well as long capacitance creating traces. Useful as a complete I2C interfaced touch sensor, or as a capacitance measuring tool. |
| color | color | 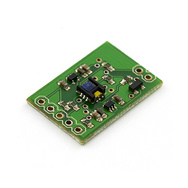 Color Light Sensor Evaluation Board Description: The ADJD-S371 is a great little sensor. This evaluation board provides all the necessary support circuitry to actually play with the sensor! |
| flex | angular position and changes | 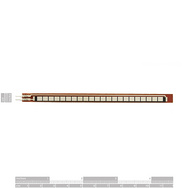 Flex Sensor 4.5" Description: A simple flex sensor 4.5" in length. As the sensor is flexed, the resistance across the sensor increases. Patented technology by Spectra Symbol - they claim these sensors were used in the original Nintendo Power Glove. The resistance of the flex sensor changes when the metal pads are on the outside of the bend (text on inside of bend). Connector is 0.1" spaced and bread board friendly. Check datasheet for full specifications. |
| force | physical pressure in an analog scale | 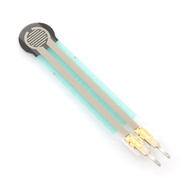 Force Sensitive Resistor - Small Description: This is a small force sensitive resistor. It has a 0.16" (4 mm) diameter active sensing area. This FSR will vary its resistance depending on how much pressure is being applied to the sensing area. The harder the force, the lower the resistance. When no pressure is being applied to the FSR, its resistance will be larger than 1MΩ, with full pressure applied the resistance will be 2.5kΩ. Two pins extend from the bottom of the sensor with 0.1" pitch making it bread board friendly. These sensors are simple to set up and great for sensing pressure, but they aren't incredibly accurate. Use them to sense if it's being squeezed, but you may not want to use it as a scale. |
| gas | alcohol, methane, CO2, CO, propane, etc | 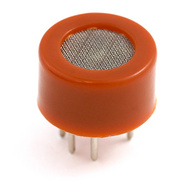 Alcohol Gas Sensor MQ-3 Description: This alcohol sensor is suitable for detecting alcohol concentration on your breath, just like your common breathalyzer. It has a high sensitivity and fast response time. Sensor provides an analog resistive output based on alcohol concentration. The drive circuit is very simple, all it needs is one resistor. A simple interface could be a 0-3.3V ADC. Features:
|
| gyroscope | rotation | 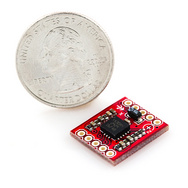 Gyro Breakout Board - LPY530AL Dual 300°/s Description: This is a breakout board for the ST's dual-axis LPY530AL gyro (don't mind the photos). The LPY530AL measures angular velocity along the pitch and yaw axes with a full scale of ±300°/s. Two different analog outputs are provided for both the x- and z- axes - one 1x amplified and the other 4x amplified. A regulated voltage between 2.7 and 3.6VDC should be supplied to the power pins. We have the filtering circuits all set up; you'll just need to connect the outputs to an ADC, and you're ready to go. This breakout board includes the gyro and all necessary filtering capacitors as shown. The 1x and 4x amplified outputs of both axes are connected to the 0.1" pitch headers, along with the power-down, self-test, high-pass filter reset, and power pins. |
| Hall effect | magnetic fields | 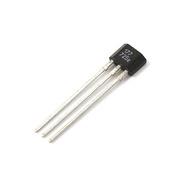 Description: The US1881 is an integrated Hall effect latched sensor. That's nice but what does it do? Holding a magnet near the sensor will cause the output pin to toggle. This makes for a robust presence sensor. A reed sensor also works nicely, but can be limited by the glass encapsulation and size. A hall effect sensor is much smaller, but can handle less current than a reed switch. The device includes an on-chip Hall voltage generator for magnetic sensing, a comparator that amplifies the Hall voltage, and a Schmitt trigger to provide switching hysteresis for noise rejection, and open-collector output. An internal bandgap regulator is used to provide temperature compensated supply voltage for internal circuits and allows a wide operating supply range. If a magnetic flux density larger than threshold Bop, DO is turned on (low). The output state is held until a magnetic flux density reversal falls below Brp causing DO to be turned off (high). Features:
|
| microphone/ acoustic | sound | 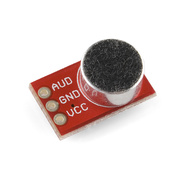 Breakout Board for Electret Microphone Description: Ready to add audio to your next project? This small breakout board couples a small electret microphone with a 100x opamp to amplify the sounds of voice, door knocks, etc loud enough to be picked up by a microcontroller's Analog to Digital converter. Unit comes fully assembled as shown. Works from 2.7V up to 5.5V. |
| motion | changes in relative distance | 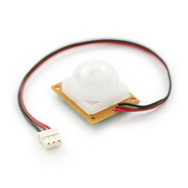 PIR Motion Sensor Description: This is a simple to use motion sensor. Power it up and wait 1-2 seconds for the sensor to get a snapshot of the still room. If anything moves after that period, the 'alarm' pin will go low. Red wire is power (5 to 12V). Brown wire is GND. Black wire is open collector Alarm. This unit works great from 5 to 12V (datasheet shows 12V). You can also install a jumper wire past the 5V regulator on board to make this unit work at 3.3V. Sensor uses 1.6mA@3.3V. The alarm pin is an open collector meaning you will need a pull up resistor on the alarm pin. The open drain setup allows multiple motion sensors to be connected on a single input pin. If any of the motion sensors go off, the input pin will be pulled low. The connector is slightly odd but has a 0.1" pitch female connector making it compatible with jumper wires and 0.1" male headers. |
| photocell | light | 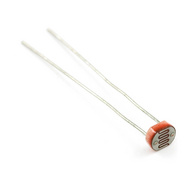 Mini Photocell Description: This is a very small photocell. A photocell changes (also called a photodetector, CdS or photoconductive cell) resistance depending on the amount of light it is exposed to. These little sensors make great ambient light triggers (when light in the room turns on, do something). Features:
|
| pressure | air or fluid pressure | 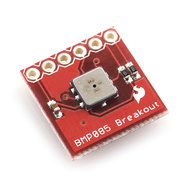 Barometric Pressure Sensor - BMP085 Breakout Description: This is a simple breakout board for the BMP085 high-precision, low-power barometric pressure sensor. The BMP085 offers a measuring range of 300 to 1100 hPa with an absolute accuracy of down to 0.03 hPa. It's based on piezo-resistive technology for EMC robustness, high accuracy and linearity as well as long term stability. This sensor supports a voltage supply between 1.8 and 3.6VDC. It is designed to be connected directly to a micro-controller via the I²C bus This breadboard-friendly board breaks out all pins of the BMP085 to a 6-pin 0.1" pitch header. The analog and digital supplies (VDDD and VDDA) of the BMP085 are tied together and broken out to a single pin. We've also put two 4.7k pull-up resistors on the I2C lines. Features:
|
| potentiometer | rotation or linear position on an analog scale | 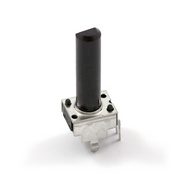 Rotary Potentiometer - Linear Description: An adjustable potentiometer can open up many interesting user interfaces. Turn the pot and the resistance changes. Connect VCC to an outer pin, GND to the other, and the center pin will have a voltage that varies from 0 to VCC depending on the rotation of the pot. Hook the center pin to an ADC on a microcontroller and get a variable input from the user! This is a center-tap linear type potentiometer. The outer two pins will always show 10K resistance, the center pin resistance to one of the outer pins will vary from 10K Ohm to about 50 Ohm. The pot is linear meaning the resistance will vary linearly with its position. This is a good choice for general user interfaces. This pot works great in a breadboard but on a few breadboards, you may have to trim off the large metal anchors. |
| pulse | heartbeat rate | 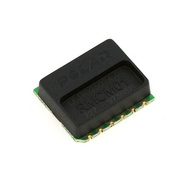 Polar Heart Rate Module - RMCM01 Description: This is a OEM module for the Polar Heart Rate system. This device works with any Polar heart rate strap to pickup the electromagnetic pulse and output a 1ms pulse indicating a heart beat has occurred. Embed a heart rate reading into your next project! The RMCM01 requires no antenna. It does require a 32kHz crystal but that crystal does not need capacitors. Please see the basic schematic below. |
| ranging | distance between objects | 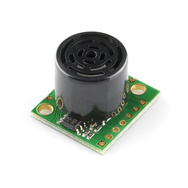 Ultrasonic Range Finder - Maxbotix LV-EZ1 Description: This is the fantastically easy to use sensor from Maxbotix. We are extremely pleased with the size, quality, and ease of use of this little range finder. The serial interface is a bit odd (it's RS232 instead of standard TTL), but the PWM and Analog interfaces will allow any micro to listen easily enough. The sensor provides very accurate readings of 0 to 255 inches (0 to 6.45m) in 1 inch increments with little or no dead zone! Maxbotix is offering the EZ0, EZ1, EZ2, EZ3, and EZ4 with progressively narrower beam angles allowing the sensor to match the application. Please see beam width explanation below. Control up to 10 sensors with only two pins! Checkout the Maxbotix FAQ listed below. Features:
|
| rotary encoder | rotation on a digital scale | 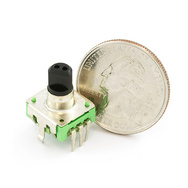 Description: This is a 12-step rotary encoder with a nice 'clicking' feel. It's breadboard friendly, and has a pretty handy select switch (by pushing in on the knob). The encoder is different from a potentiometer in that an encoder has full rotation without limits. The unit outputs gray code so that you can tell how much and in which direction the encoder has been turned. |
| stretch | physical deformation or strain |  Description:The Stretch Sensor is a unique component that changes resistance when stretched. When relaxed the sensor material has a nominal resistance of 1000 ohms per linear inch. As the stretch sensor is stretched the resistance gradually increases. When the sensor is stretched 50 % its resistance will approximately double to 2.0 Kohms per inch. |
| smoke | airborne particles | 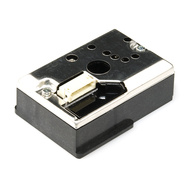 Optical Dust Sensor - GP2Y1010AU0F Description: Sharp's GP2Y1010AU0F is an optical air quality sensor, designed to sense dust particles. An infrared emitting diode and a phototransistor are diagonally arranged into this device, to allow it to detect the reflected light of dust in air. It is especially effective in detecting very fine particles like cigarette smoke, and is commonly used in air purifier systems. The sensor has a very low current consumption (20mA max, 11mA typical), and can be powered with up to 7VDC. The output of the sensor is an analog voltage proportional to the measured dust density, with a sensitivity of 0.5V/0.1mg/m3. To interface with the sensor you need to connect to its 6-pin, 1.5mm pitch connector; we do have a mating connector for this. |
| switch | physical pressure on a digital scale | 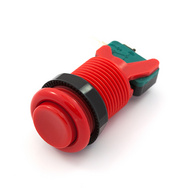 Concave Button - Red Description: This is a 35mm concave momentary push button similar to the ones you find on arcade games. Simple screw in design. Perfect for mashing. This button has a great tactile, 'clicky' feel. Features:
|
| thermistor | temperature | 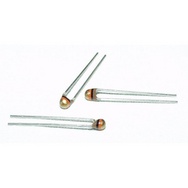 Thermistor 10K Vishay part #: NTCLE100E3103JB0 Description: 10K thermistor with a negative temperature coefficient. Good choice for temp-sensing aplications. |
| tilt | angular attitude | 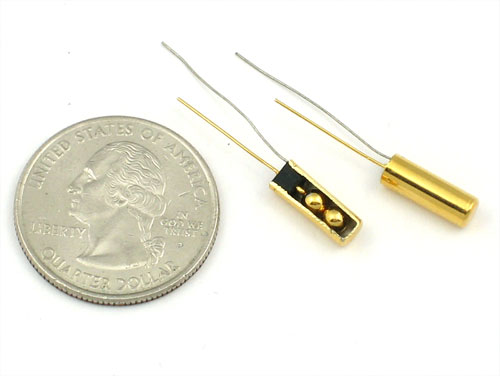 Description:The "poor man's" accelerometer! Tilt sensors are switches that can detect basic motion/orientation. The metal tube has a little metal ball that rolls around in it, when its tilted upright, the ball rolls onto the contacts sticking out of end and shorts them together. |
Kits
- Many Lab's
- Sparkfun
- Parallax
- SunFounder 37 modules Arduino Sensor Kit
- Adafruit
- Tinkerkit at Mouser
- LittleBits
- Moss
Sources
Books
- Getting Started with Sensors: Measure the World with Electronics... by Kimmo Karvinen
- Make: Sensors: A Hands-On Primer for Monitoring the... by Tero Karvinen
- Beginning Sensor Networks with Arduino and Raspberry... by Charles Bell
Feedback Loops
"The formulation of the problem is often more essential than the solution."— Albert EinsteinFeedback loops are essential to engaging students in the learning process. Always provide timely feedback and make sure that feedback encourages next steps.
We want students to love learning and to be actively engaged. More important than just knowing facts, we want them to be able to do something with their knowledge, to be creative and innovative, and we want our students to ask the right questions, to be able to :
- Weigh the evidence
– Is something true or false? What is the evidence, and is that evidence credible? - Be aware of diverging viewpoints
– What is being heard? Who is the author, and what are his or her intentions/motivations? How might it look to someone with a different perspective? - To See Connections/Cause & Effect
– Are there patterns or connections? - To Speculate on Possibilities
–To ask the what if questions. To get students to imagine alternatives. - To Assess Value
– To ask what difference it makes? Who are the stakeholders? And what are the implecations?
See also Reframing a question can lead to innovation
How to Engage Students
Influence and Incentivize (Using Game Dynamics)- Appointment Dynamic— doing something at a particular place and time
- Influence and Status—Leveling Up (quizes and extra projects to replace or enhance work)
- Progression dynamics—challenges, earn points and move from point a to point b
- Communal discovery—working together to solve problems—Find the best stories
The following list was collected from: Harris, Bryan (2013-10-02). Battling Boredom: 99 Strategies to Spark Student Engagement (Kindle Locations 401-403). Taylor and Francis.)
- Using Fantastic Facts to begin a lesson is an effective way to gain attention, motivate students to learn more, and to engage them in the content that will be addressed in the lesson.
- Most students do better when they have a clear goal and understanding of the expectations and learning outcomes. The creation of personal goals helps to focus students on learning priorities and can cause them to listen differently during the lesson. When learning tasks are connected to personal goals, the learning becomes more relevant.
- An expert not only knows how to define or explain an idea but they can also share examples, give characteristics, and answer questions about the concept. Find an expert or challenge a student to become one.
- Sometimes an odd association can be created between an object and the content being studied. For example, when studying whole to part fraction concepts, bring in an orange to display how one whole object can be divided into parts.
- Instruct students to find or create pictures that relate to the concepts, key ideas, or vocabulary terms that have been learned.
Collages do not need to be complex in order to be effective. The power of Concept Collages lie in the fact that they are personalized and that students are asked to elaborate and explain their thoughts. - map out connections between topics and ideas. Encourage the use of colors, symbols, lines, arrows, icons, and diagrams in addition to text.
Design Process
The Design Process requires- Collaboration
- Research
- Design
- Building
- Testing
- Communication
Basic steps
- Describe the general situation or problem you are trying to solve. Instead of asking "what do you want to design?" ask "why do you want to design that?" and "what problem and or need will your design ultimately be solving?"
- Identify your target population, which group of people will benefit from your project. Is the target population an individual, a group, a specific community, or a larger, identifiable population? Is the target population from a specific location (country, region, town), demographic (age or gender), or other identifying characteristics (health condition or employment)? How is your target population connected?
- Identify requirements and constraints. A requirement is a need or a necessity; it's what a particular product or service should do. A constraint is a restriction on the degree of freedom you have in providing a solution to a need or problem.
- Ask what are the disadvantages of the present solution to the problem?
- Ask what compromises have been made in the present solution?
- Determine if the compromises are necessary?
- Determine if the solution can be improved?
- By taking a new approach
- By making the design more accurate, safer, more convenient, easier to maintain, cheaper, or more attractive
- Determine if you can reduce the costs by eliminating parts, using different materials, changing the way the product is manufactured?
In a nutshell
- Design Step 1: Identify the Need
- Design Step 2: Research the Problem
- Design Step 3: Brainstorm Possible Solutions
- Design Step 4: Engineering Analysis-select the most promising solution
- Design Step 5: Construct a Prototype
- Design Step 6: Evaluate/Manufacture a Final Product-Reiterate
Design Provocations
The following list is attributed to Alex Osborn- Substiture something
- Combine it with something else
- Adapt something to it
- Modify or magnify it
- Put it to some other use
- Eliminate something
- Reverse or rearrange it
Digital Portfolios
What is the purpose of the portfolio?- Portfolio as Storage/Collection
- Portfolio as Workspace/Process
- Portfolio as Showcase/Product
- Portfolio as Assessment tool
A digital portfolio provide students with the opportunity to demonstrate achievement, as well as set sights on the next level.
A digital portfolio can be a vehicle through which students can be the authors of their own learning narratives.
Because they are cloud based, portfolios can be accessed both inside and outside of school. Maintaining a portfolio fosters independence and responsibility.
Resources
- The Challenges of Managing Student Data Posted February 26, 2013 by Jack West
- Portfolios for Assessment and Instruction. ERIC Digest. By Arter, Judith A.; And Others
- ISTE 2010
- Implement Electronic Portfolios with K-12 Students using Mobile Devices Online Course
- ePortfolios with GoogleApps
How to set up a Google Site
Information that should be collected about each project
- Project Title
- Project Description/Rationale: Information about your project, the what and why.
- Project Procedure: The how. What parts and tasks are involved and how you will go about accomplishing the tasks and putting the project together.
- Project Process: What steps you are taking. This is a section for documenting your sketches, experiments and results—what went wrong, how you did or will fix it, what is working, and what you could do different the next time. Include images, video as appropriate.
- Final Project: This is the final product of your efforts. Include working project, code, schematics, bill of materials (BOM), images, videos
- Project Implications: How might lessons learned from this project be applied elsewhere.
- Project Resources: Include links and resources you consulted while completing your projects.
Documentation
Internal Tools
- Evernote
- GoogleDocs
- Pinterest—Pinterest is a visual discovery tool that you can use to find ideas for all your projects and interests.
Have students create private boards that they share with you. See what inspires your students and protect their privacy. Your students can upload, save, sort and manage images, known as pins, and other media content (e.g. videos and gifs) through collections known as pinboards. - DropBox
External Tools
External tools- iMovie
iMovie in Education - Tumblr
- YouTube
- GoogleSites
-
Prezi is a cloud-based presentation software and storytelling tool for presenting ideas on a virtual canvas.
The product employs a zooming user interface, which allows users to zoom in and out of their presentation media, and allows users to display and navigate through information.
click here for a tutorial - Slideshare—Share what you know through presentations, infographics, and documents
- Coroflot—Designer Portfolios
- Wix/Wordpress/Squarespace
Making Space to Make
-
The Makings of Maker Spaces, Part 1: Space for Creation, Not Just Consumption
- The Makings of Maker Spaces, Part 2: Espress Yourself
- The Makings of Maker Spaces, Part 3: A Fabulous Home for Cocreation
- MakerSpace
- A Librarian's Guide to Makerspaces: 16 Resources
- Institute of Museum and Library Services:Talking Points: Museums, Libraries, and Makerspaces
- 7 THINGS YOU SHOULD KNOW ABOUT ... ™
- Creating Makerspaces in Schools
